免责声明:本文章中所有内容仅供学习交流,抓包内容、敏感网址、数据接口均已做脱敏处理,严禁用于商业用途和非法用途,否则由此产生的一切后果均与作者无关,若有侵权,请联系我立即删除!
前言
本篇文章通过一个案例介绍JS逆向过程中抠JS之后的补环境工作。
逆向过程
目标网址:aHR0cDovL3d3dy5pd2VuY2FpLmNvbS91bmlmaWVkd2FwL3Jlc3VsdD93PSVFNyVCQiVCRiVFOCU4OSVCMiVFNyU5NCVCNSVFNSU4QSU5QiVFNiVBNiU4MiVFNSVCRiVCNSZxdWVyeXR5cGU9c3RvY2s=
逆向目标:cookie中的v值
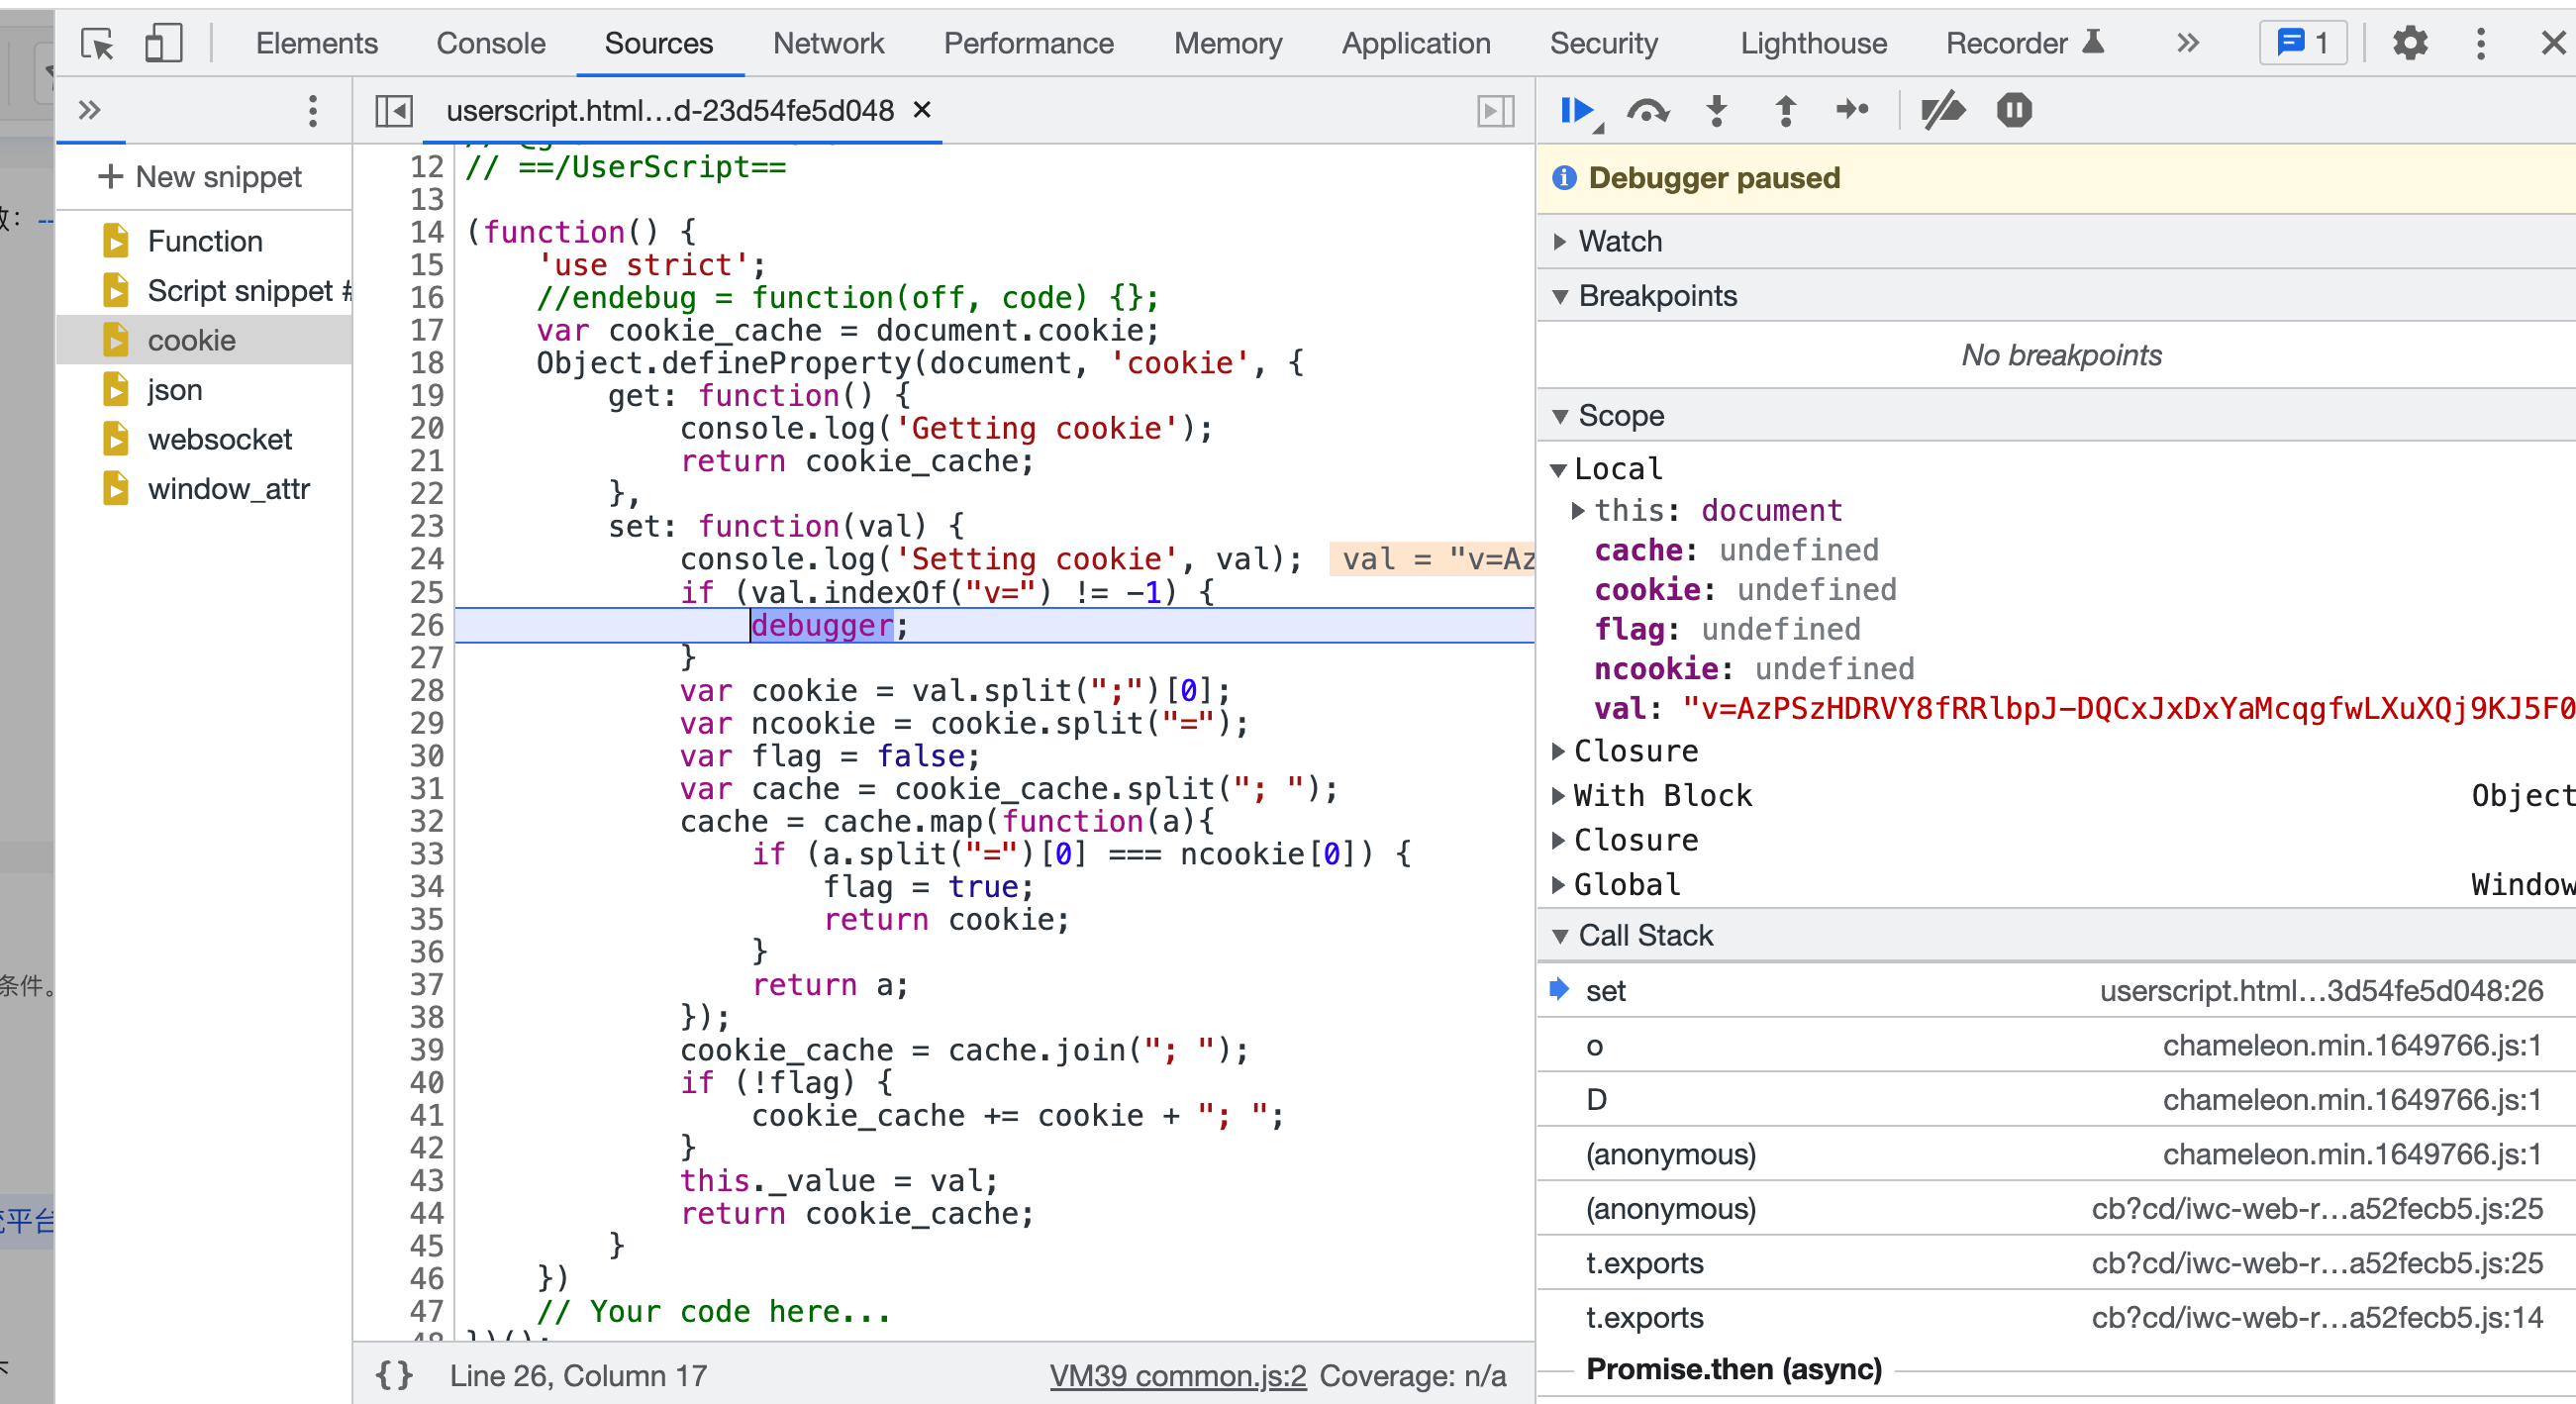
Hook Cookie
对于处理Cookie种某一个键值对生成这类问题第一反应应该是想到采用Hook的方式。这里介绍2种Hook的方式,一种是通过FD编程猫插件,一种是通过油猴插件。
- 使用油猴插件
油猴插件的使用参照:JS逆向之Tampermonkey工具篇
插件内容为:
1 | // ==UserScript== |
- 使用FD编程猫插件
FD编程猫插件用法参照:JS逆向之Fiddler编程猫插件使用
1 | //当前版本hook工具只支持Content-Type为html的自动hook |
逆向分析
无论是采用哪一种方式,都可以成功断住,如下图:
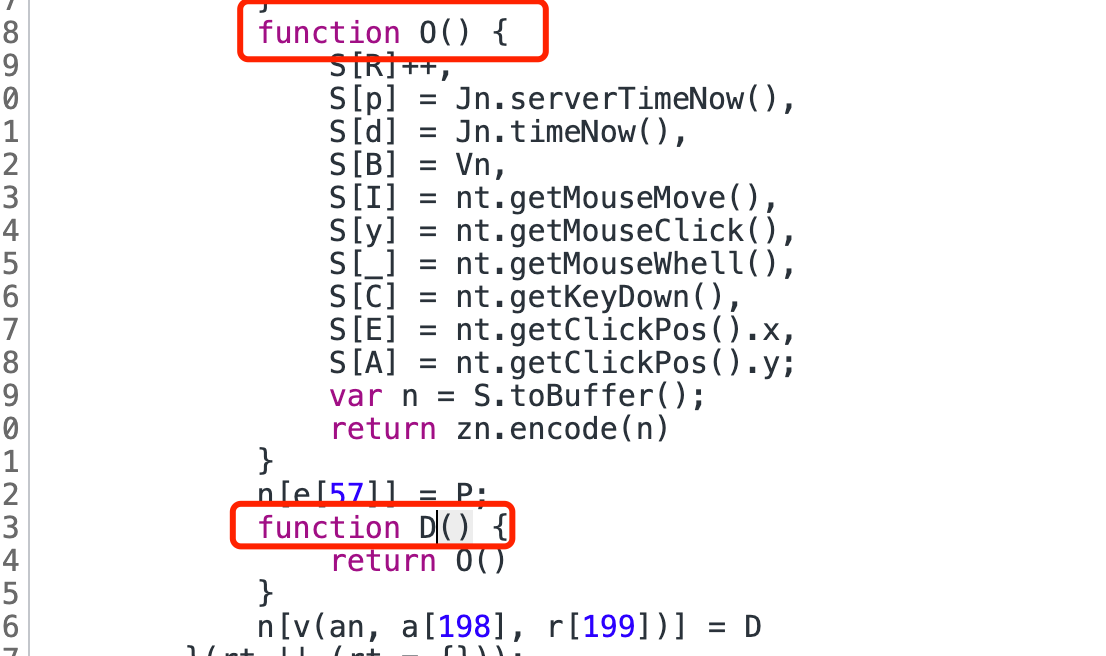
跟栈,进到o方法,发现第二个参数t就是需要的v的值。
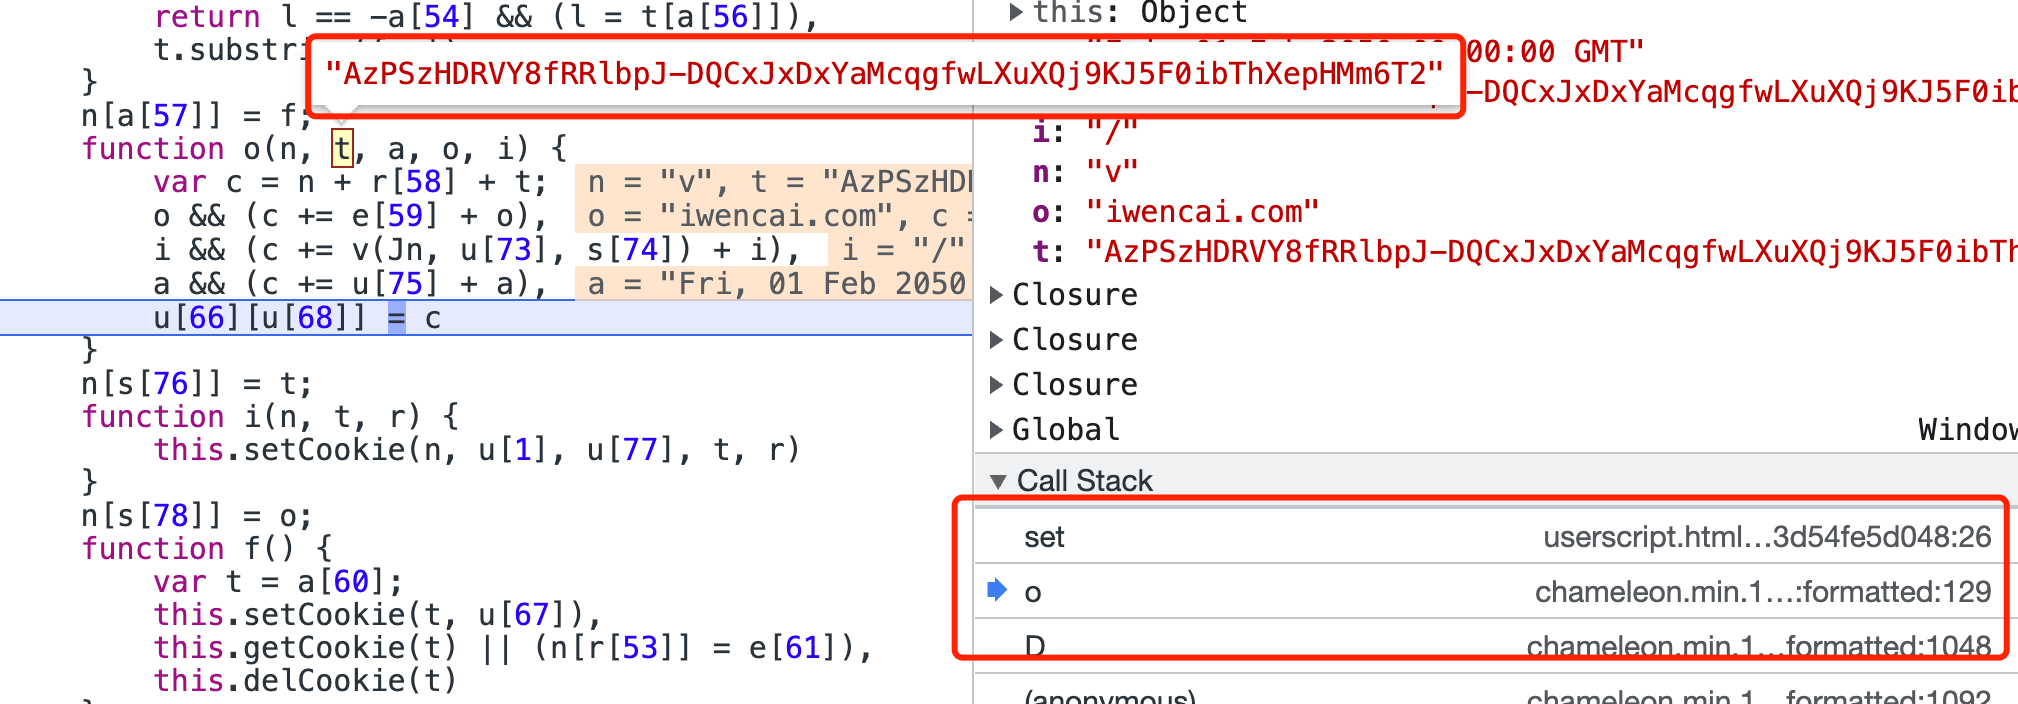
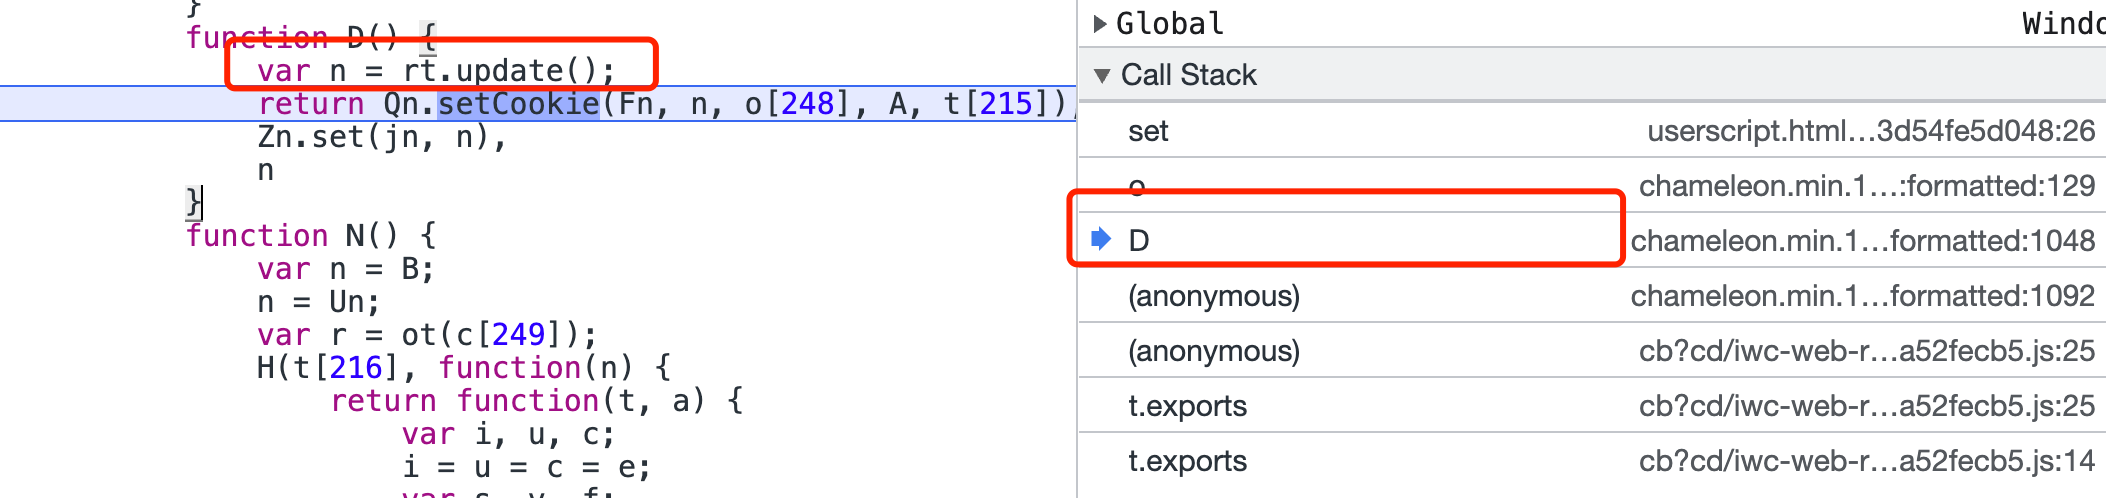
继续跟栈,进到D方法,setCookie就是上边的o方法,第二个参数n就是上边的t也就是Cookie v的值。而且n是由rt.update生成的。
我们看下rt对象:
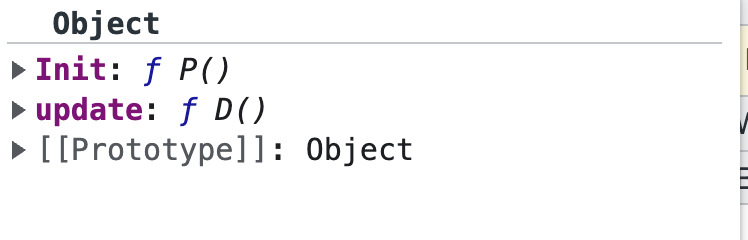
一个Init方法应该是对算法进行初始化,一个update方法则是生成v。
我们断进去update方法,update方法就是这个D方法,D方法又调用了O方法,我们跟进去。
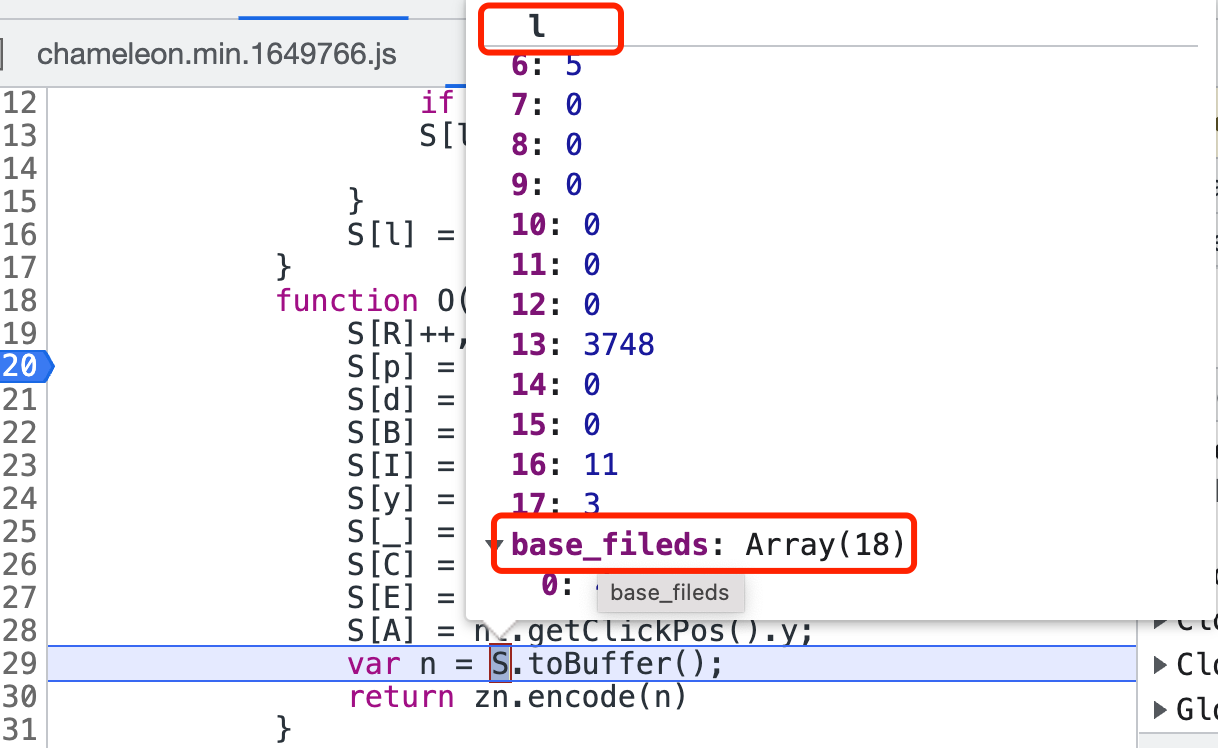
我们单步执行到S.toBuffer();可以看到S是一个l对象,并且包含一个base_fields属性。如下图:
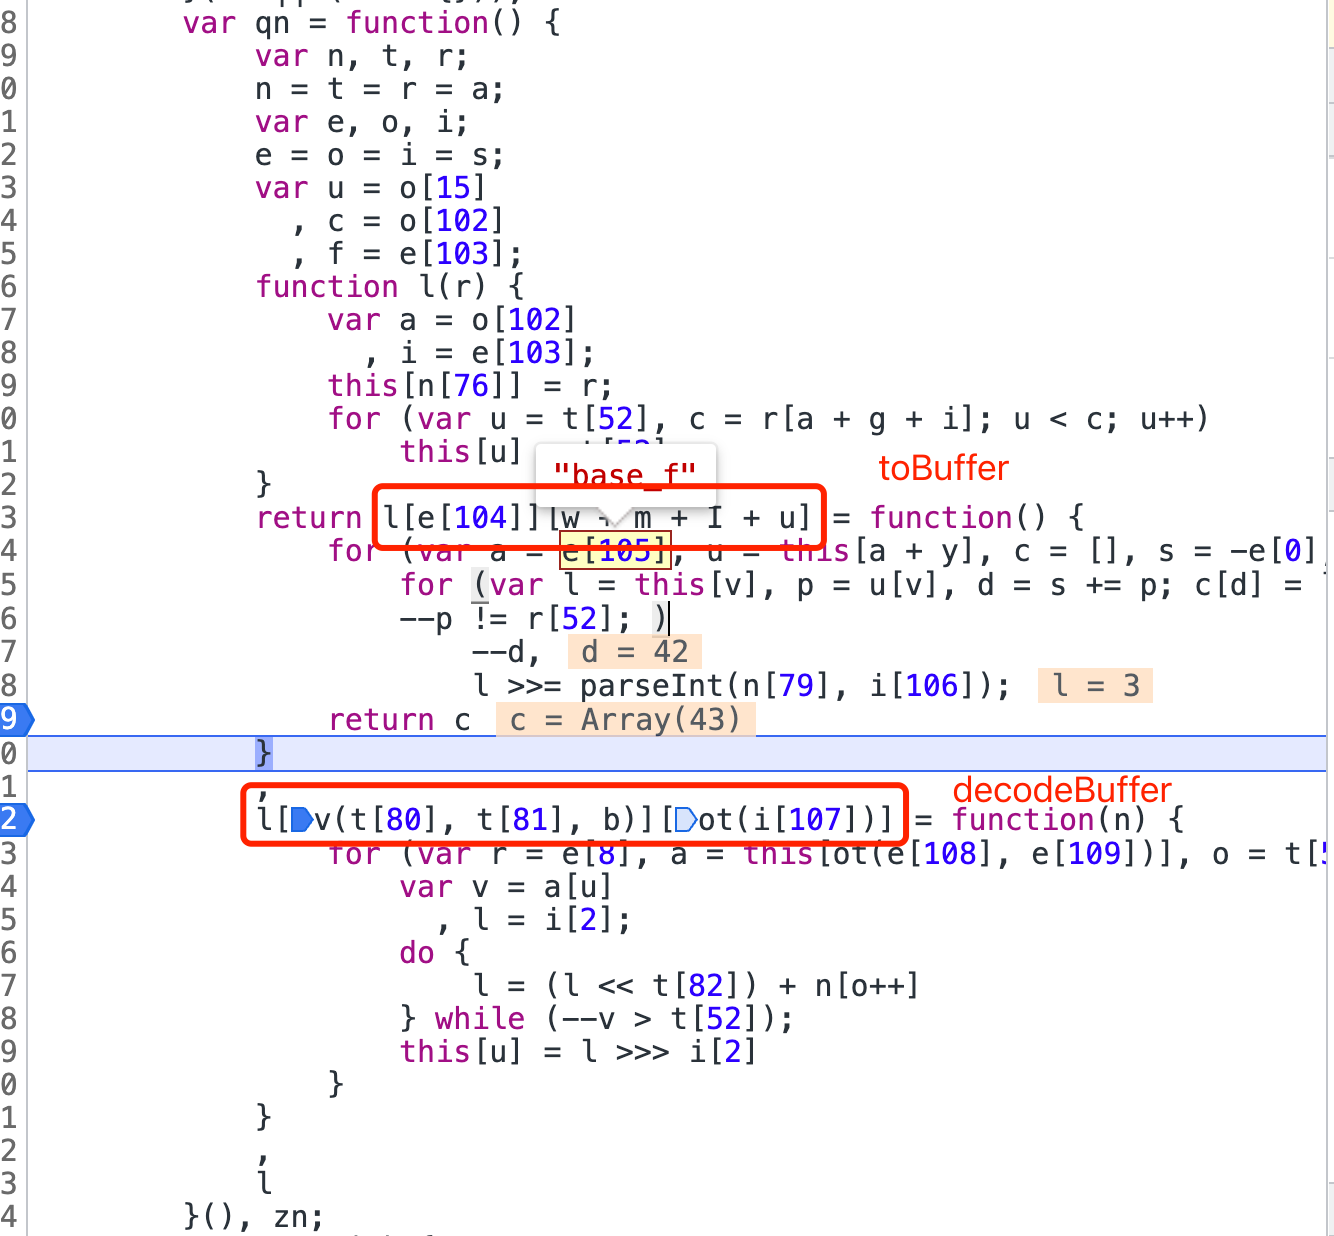
那我们点进去S.toBuffer看看能不能找到l对象的原型,qn返回了l也就是前面的S,我们住需要抠出qn就可以得到l了,注意的是qn本来就执行了,返回一个逗号表达式,逗号表达式的最后是l,所以生成l对象的正确写法是new qn(xxx)。
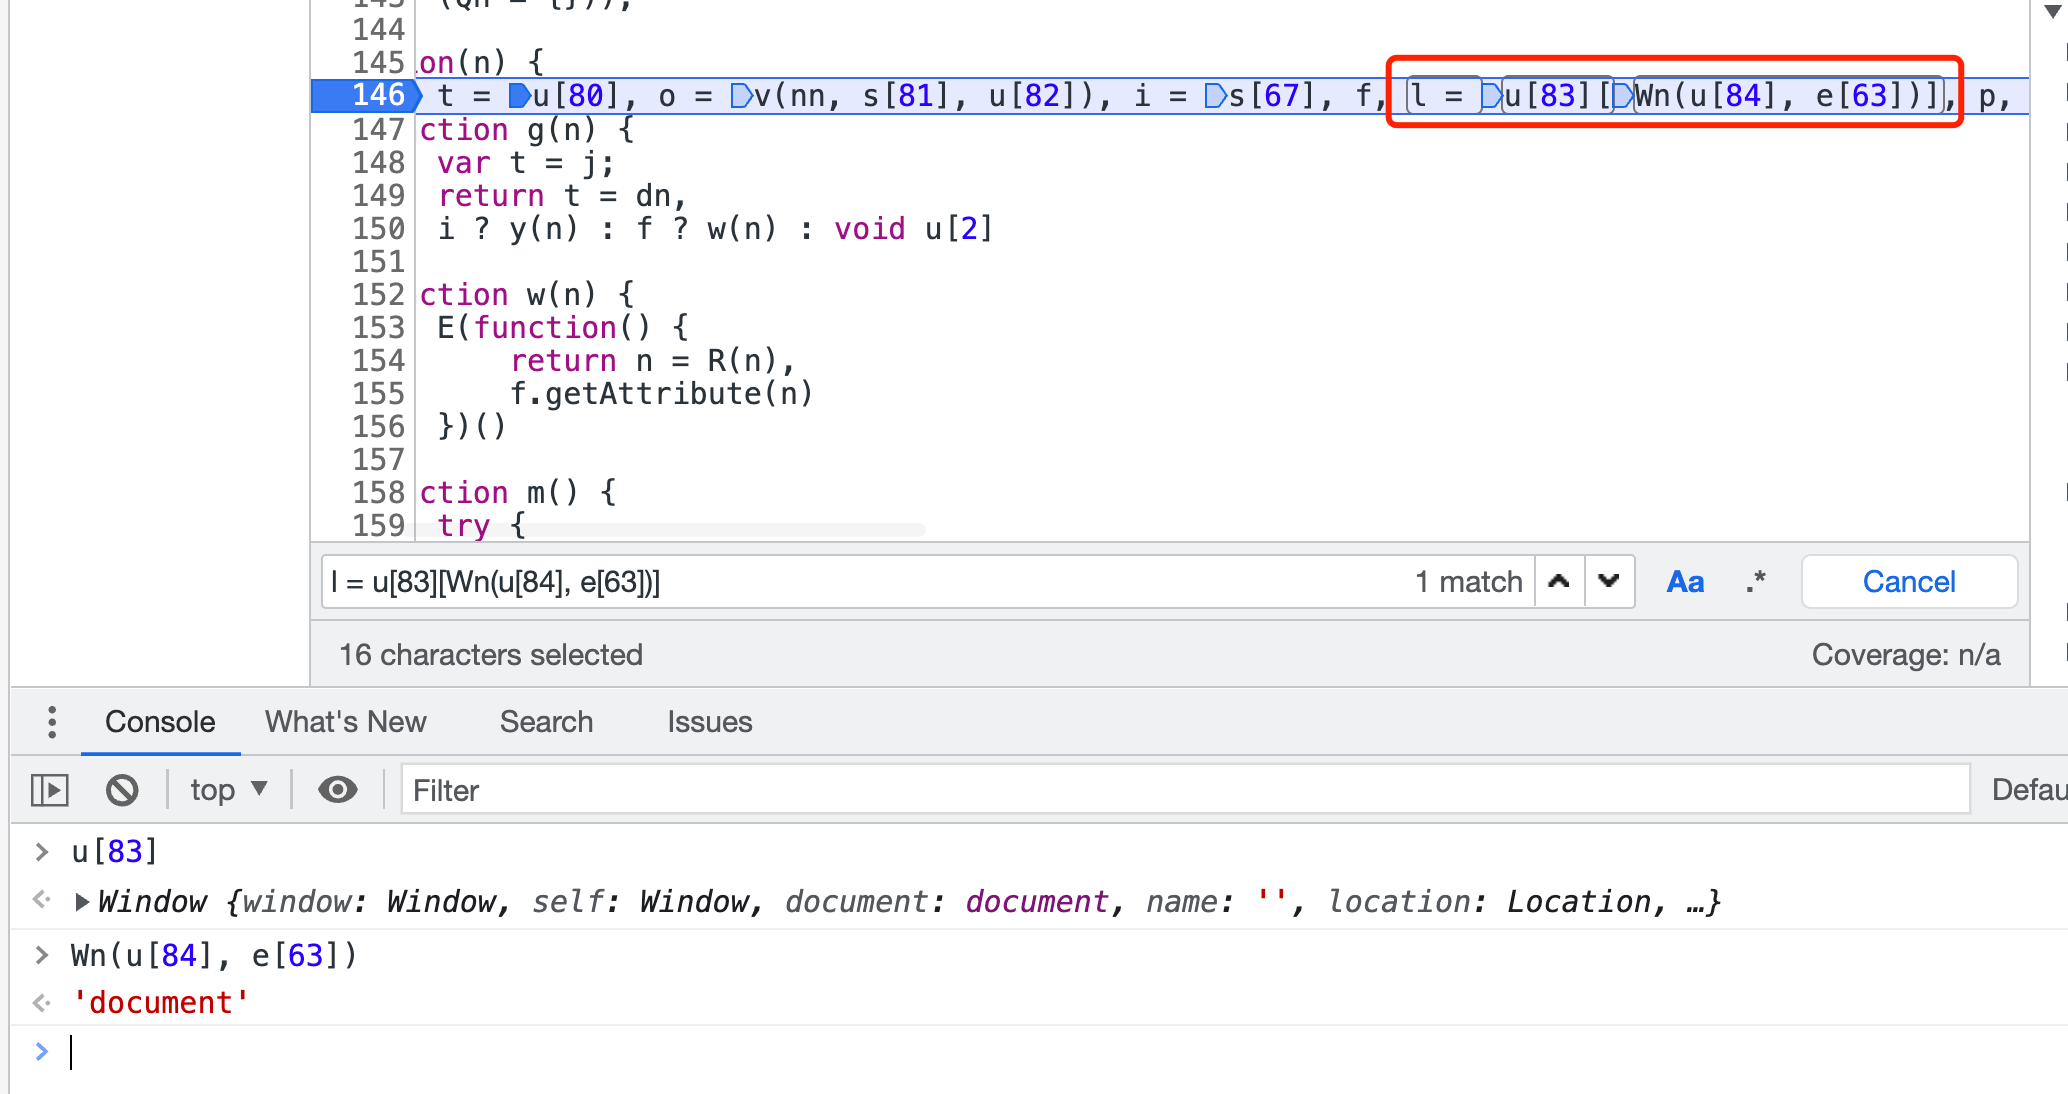
l对象在初始化的时候需要传一个r参数,我们全局搜索一下new qn看看是否能找到一个实例,看看这个r传的是啥。搜索结果如下:

我们断住这个地方,调试发现a固定为4,n固定为1,e固定为3,t固定为2。知道了如何抠出S,也知道了如果初始化S,下面我们进行检验。我们新建一个snippet然后拷贝全部的代码:
1 | var _qn; |
定一个全局变量_qn,导出qn。运行文件,没有报错,然后我们生成一个S对象:
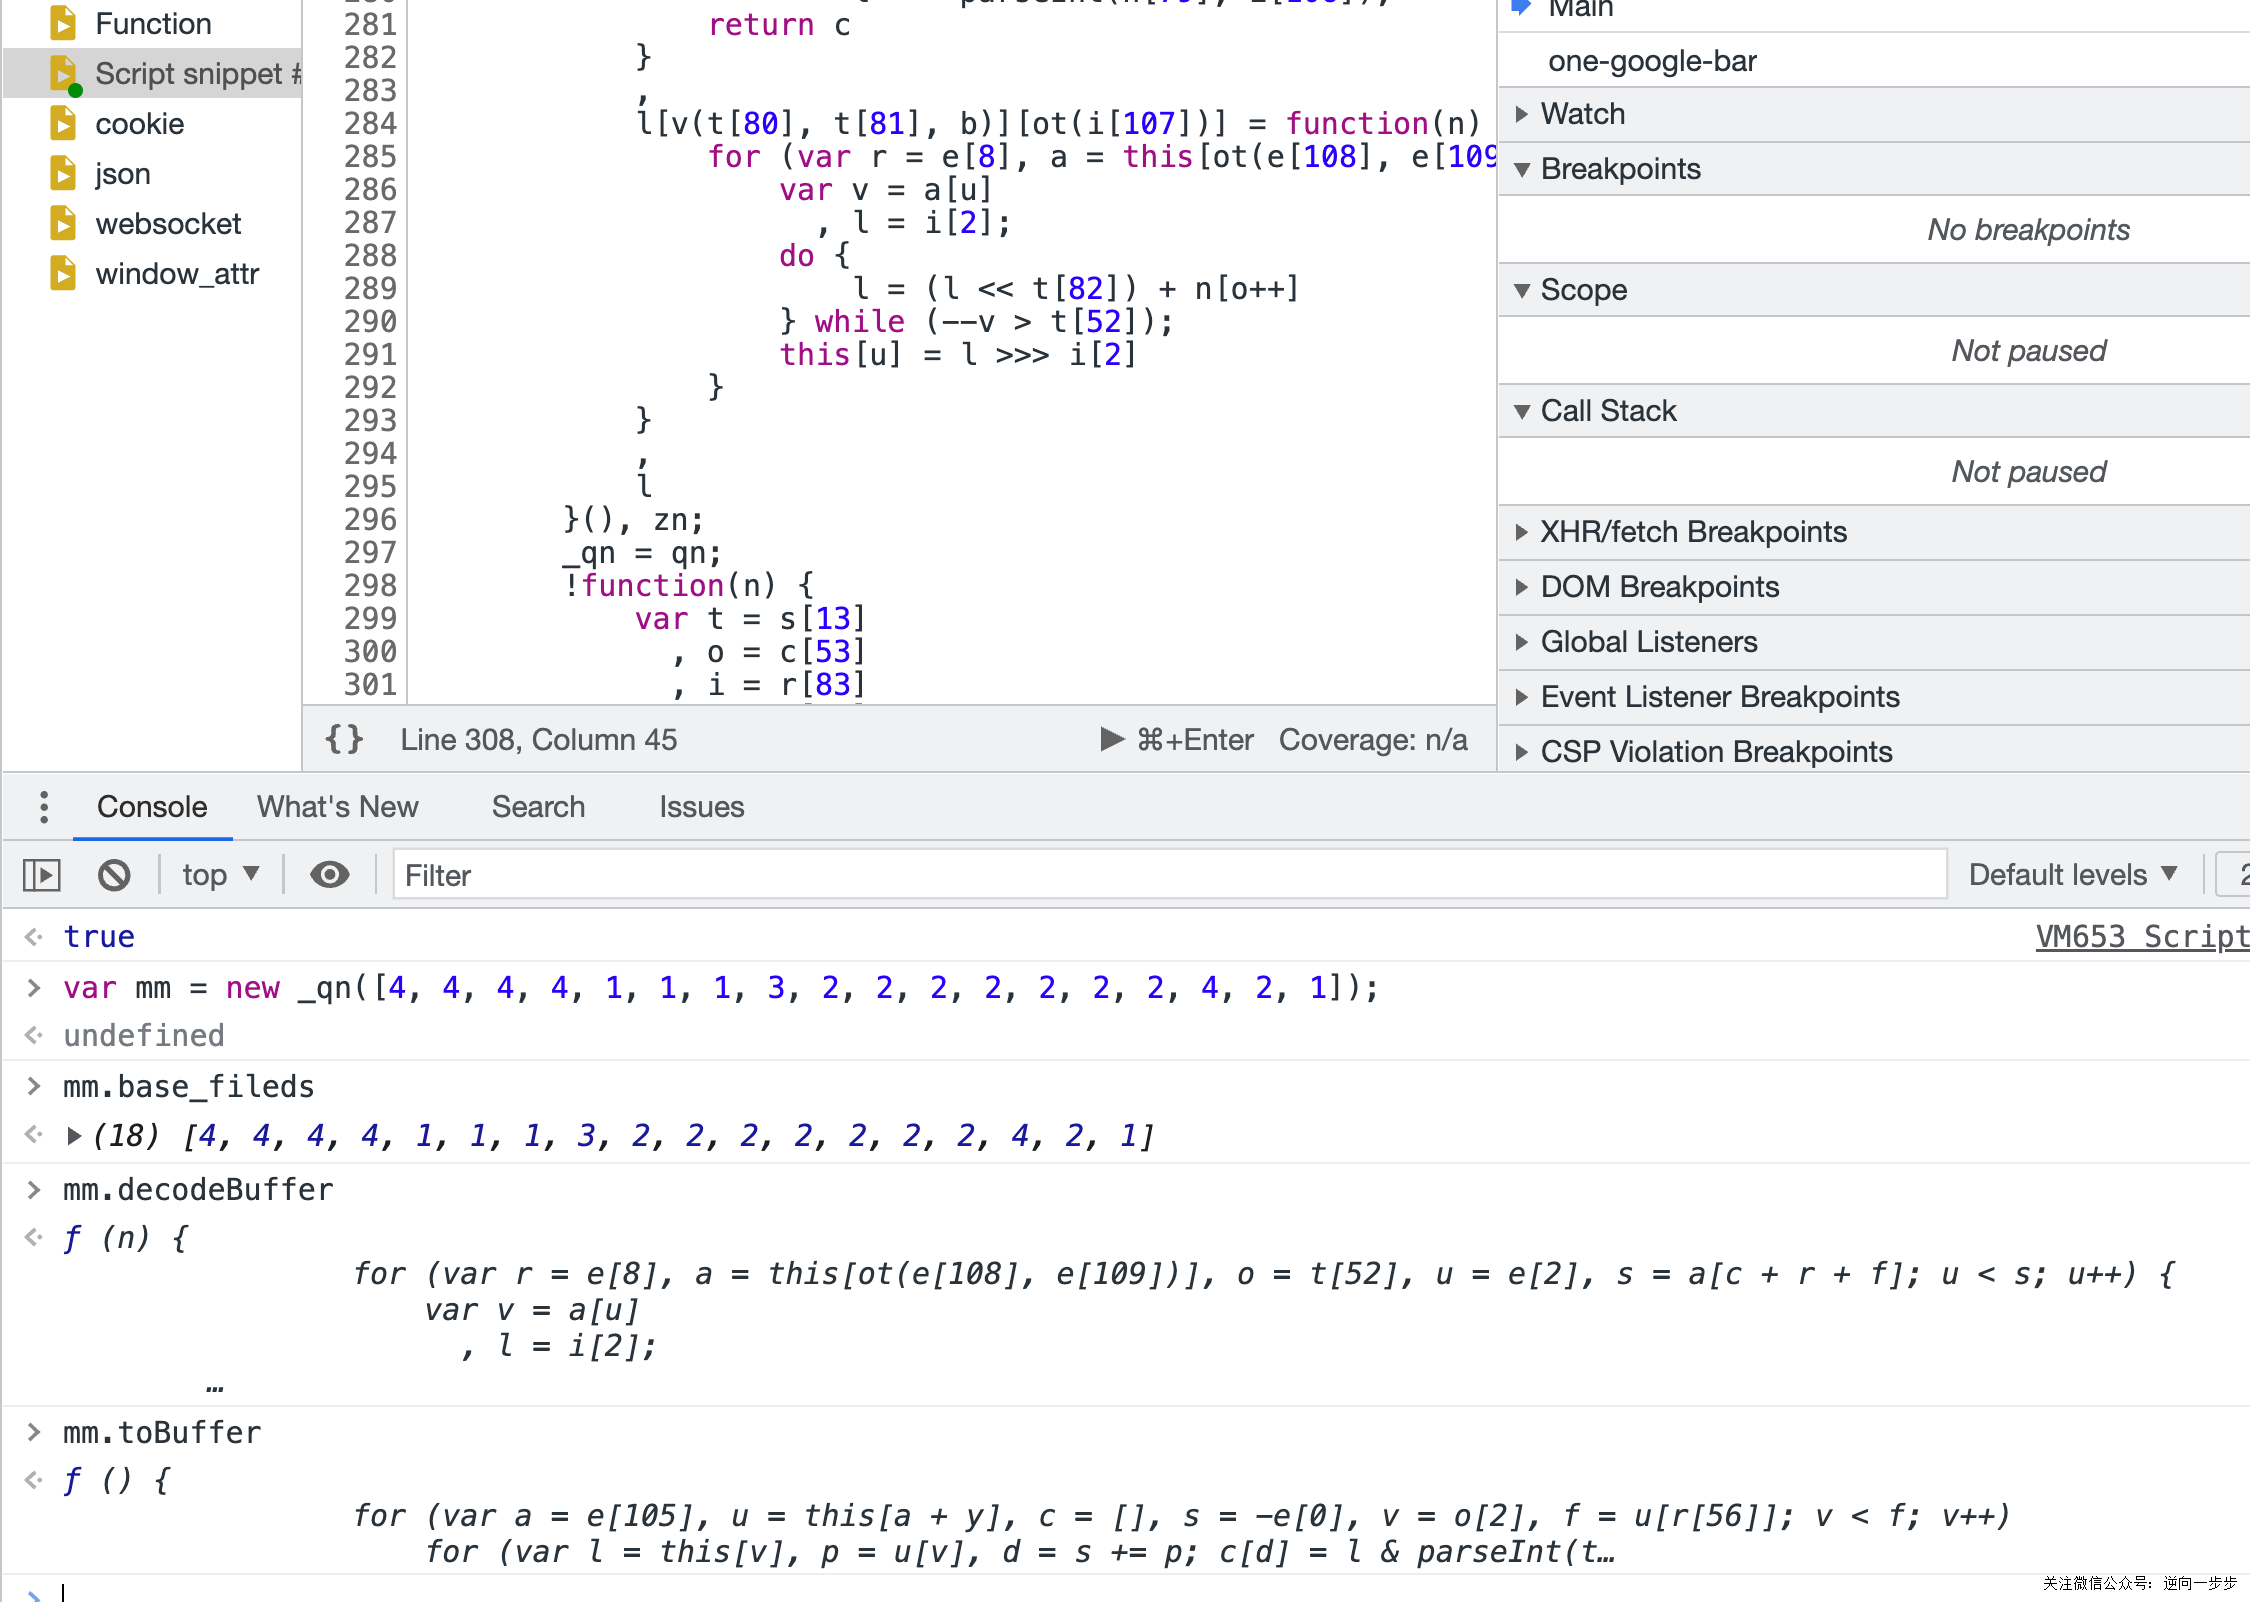
这里我们就成功的生成了S,并且可以看到decodeBuffer方法和mm.toBuffer方法也都有。别忘了我们的最终目标是得到Cookie中的v,我们回到前面的O方法,看初始化并得到S之后,后续生成v的逻辑。我们看到Jn.serverTimeNow()这一行代码,发现每次取出来的都是一个定值。
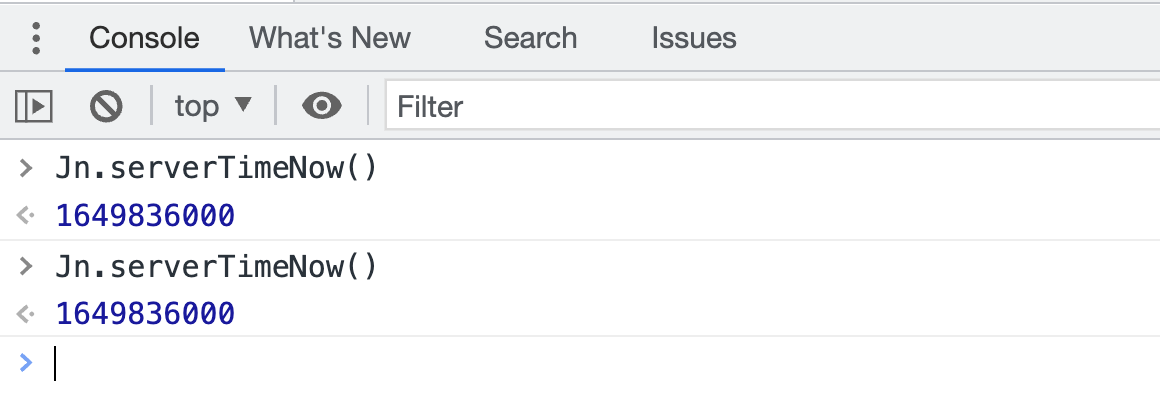
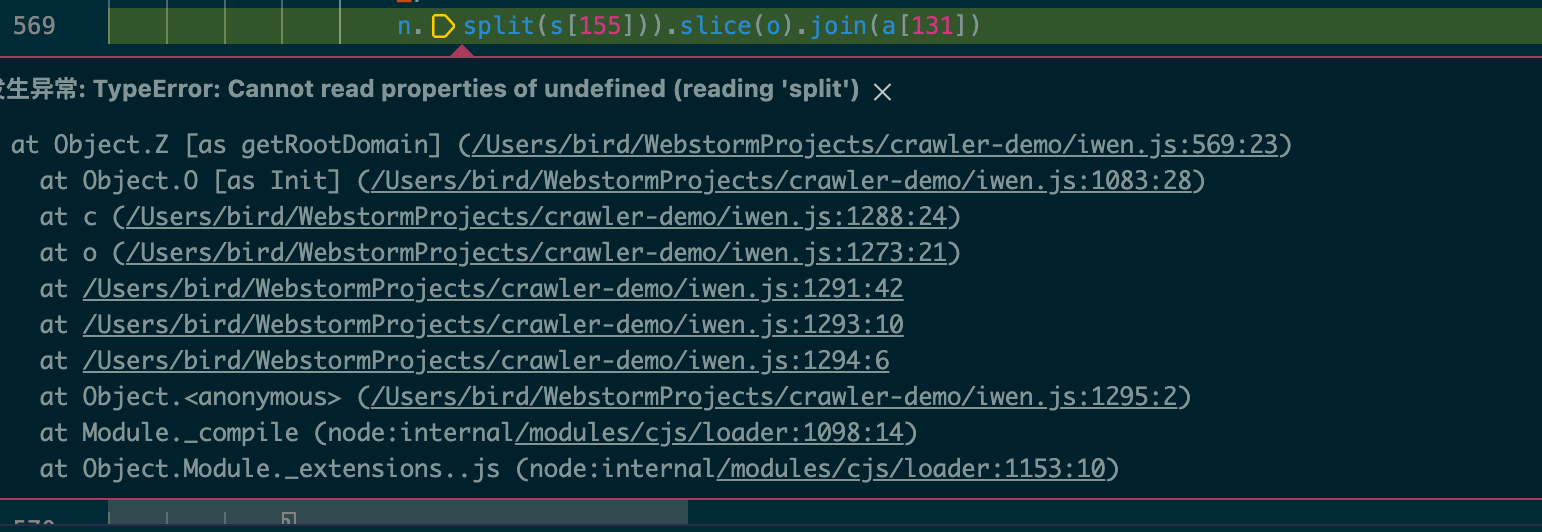
其实这个获取的就是该JS文件最前面定义的TOKEN_SERVER_TIME,这个值可能会随着JS文件更新而发生变化,所以我们采取局部扣JS的方法可能会很麻烦,因为可能需要定期更新TOKEN_SERVER_TIME的这个值。那只能全扣了啊,问题是抠下来全部的JS,放在本地执行之后,去哪里拿这个Cookie呢?答案是从document中拿,但是本地没有document呀,所以接下来就是补环境了。

补环境
按照JS逆向之vscode无环境联调介绍的,把整个JS代码粘贴到VS Code中,然后开启DevTools,运行之后报document不存在:
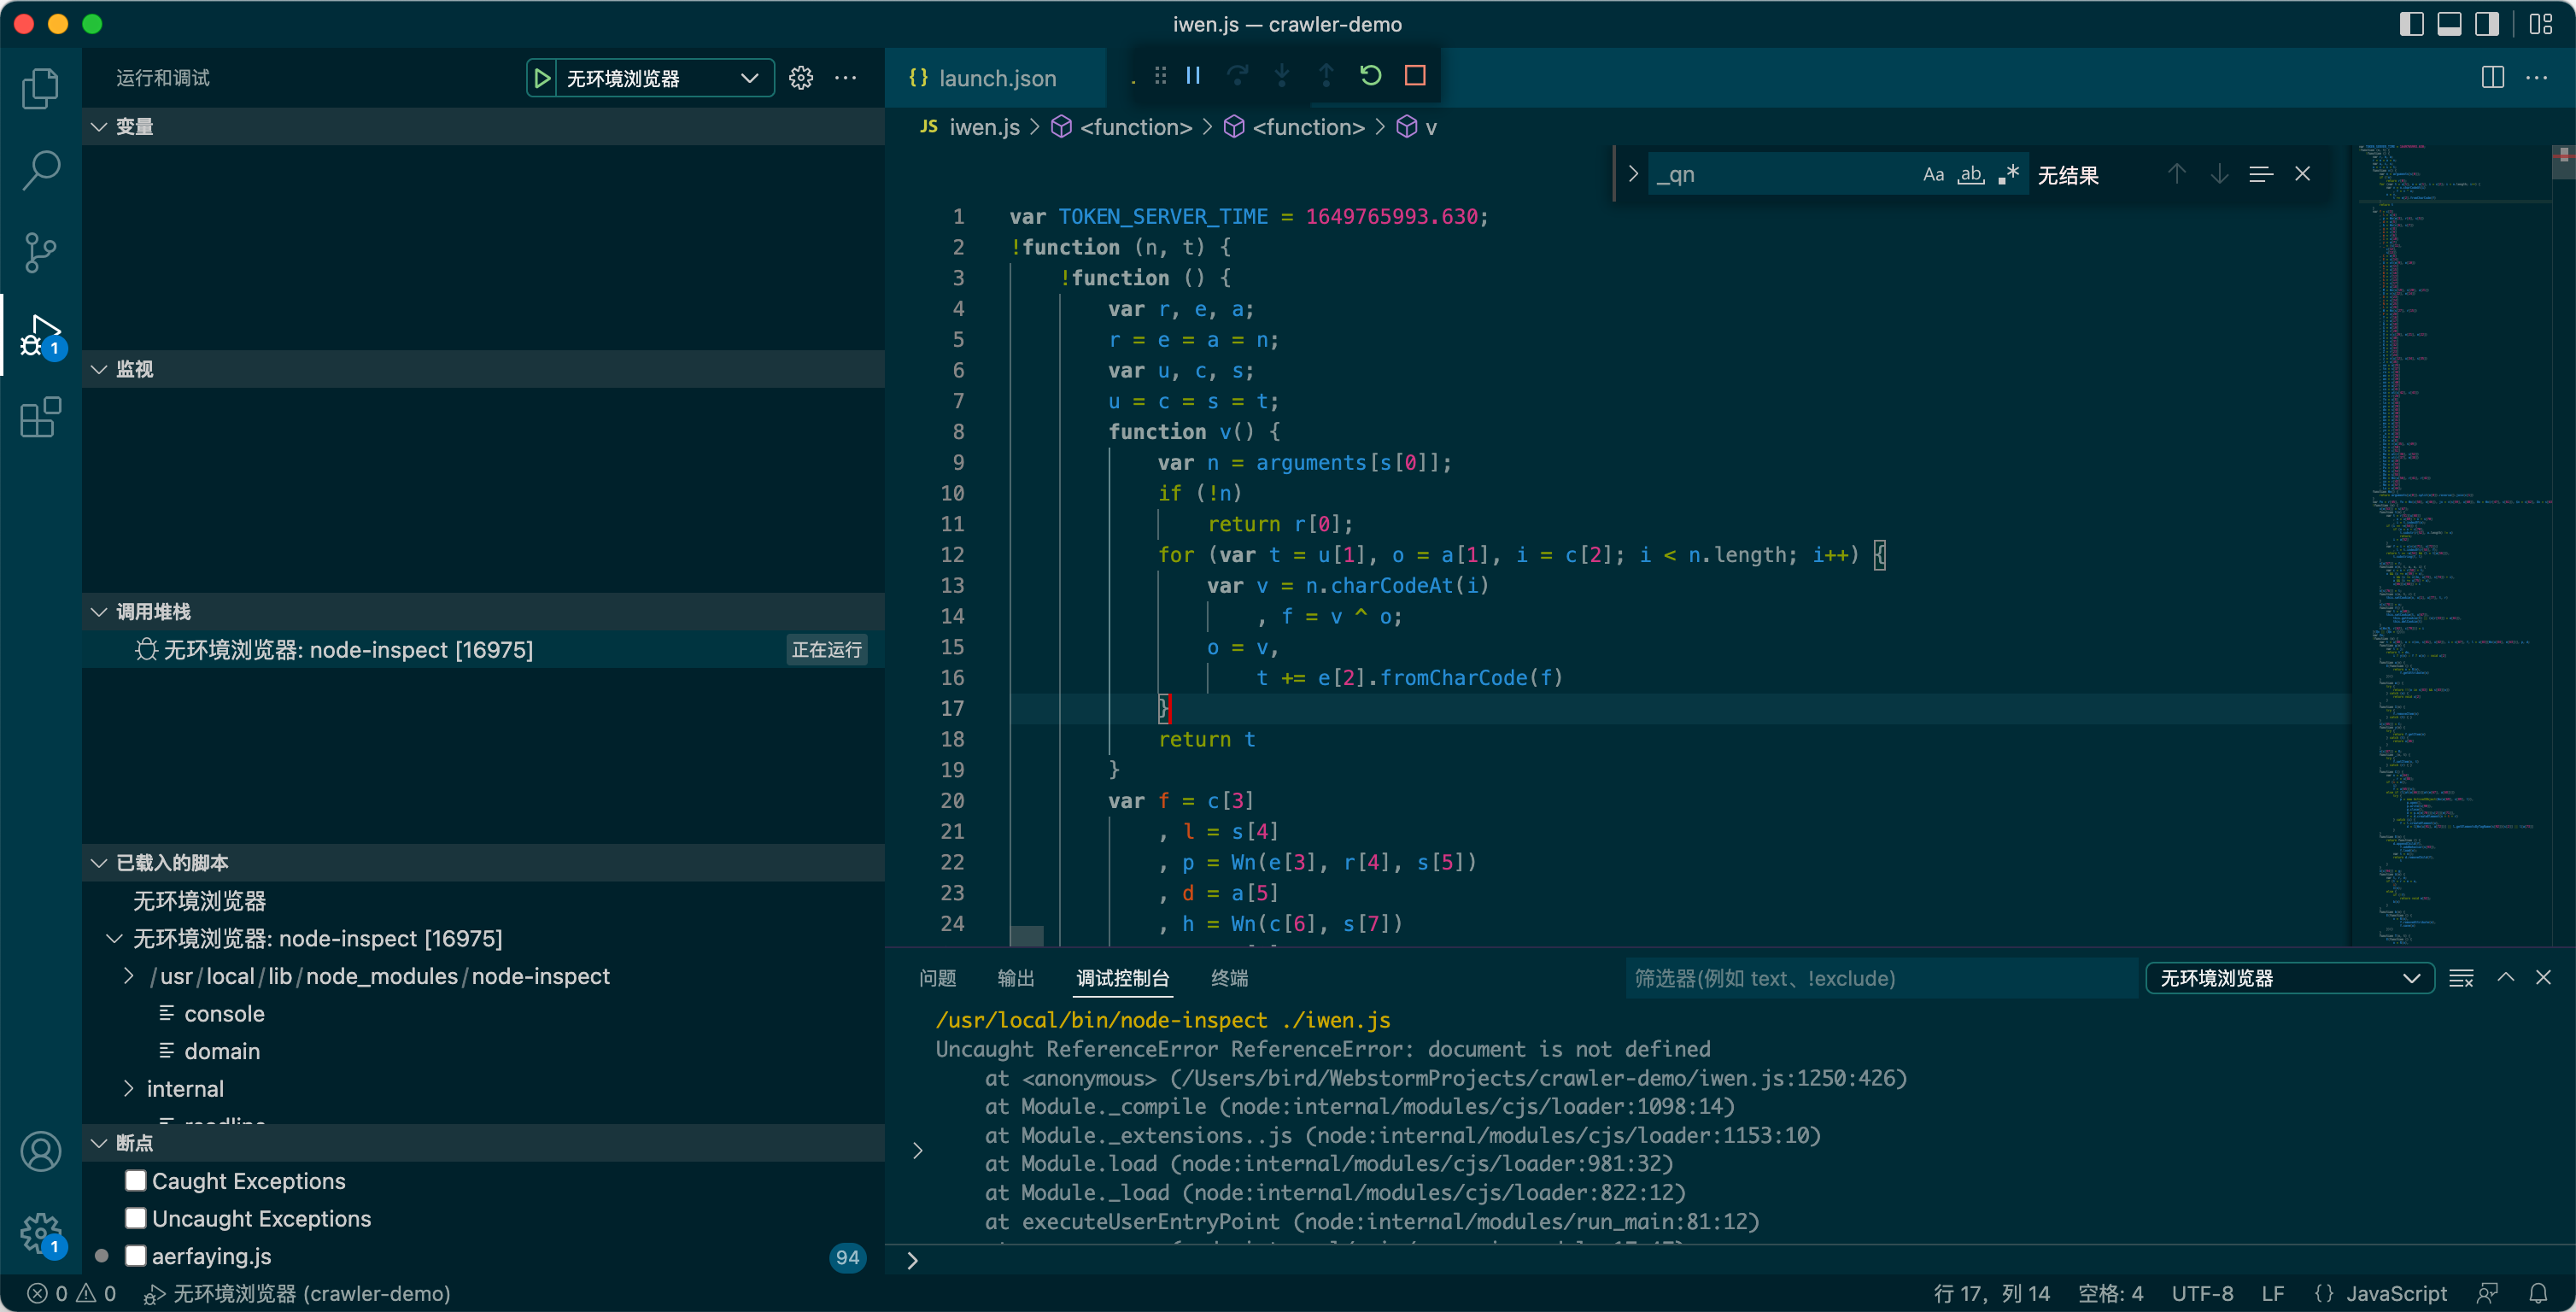
像这种拷贝整个JS然后补环境,需要补头补尾,中间的整个JS文件不能动,这样做的好处是中间的文件可以用一个占位符表示,以后每次JS更新了,只需要更新这个占位符的内容,这样更加通用,维护起来更加容易
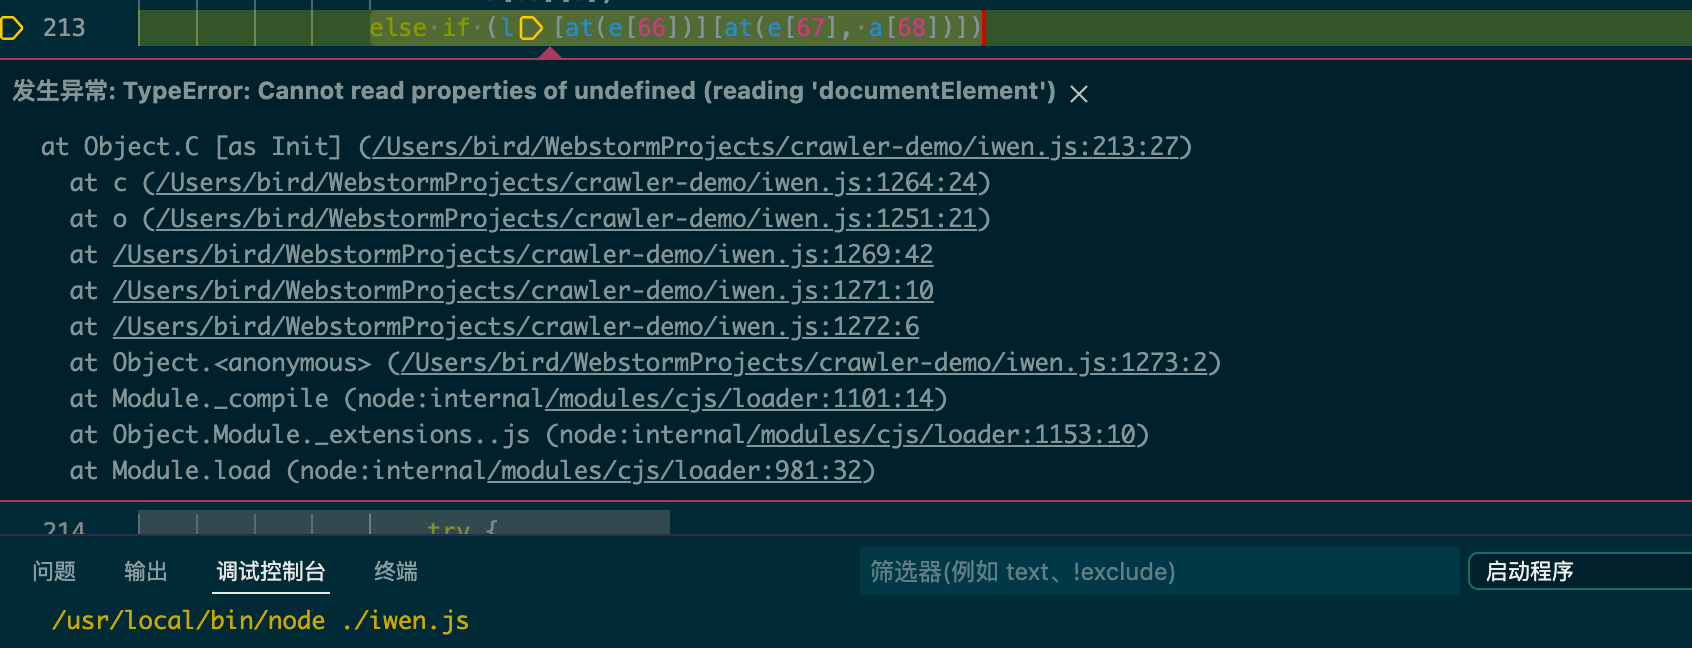
我们补好window和document之后,再次运行,接着报错:
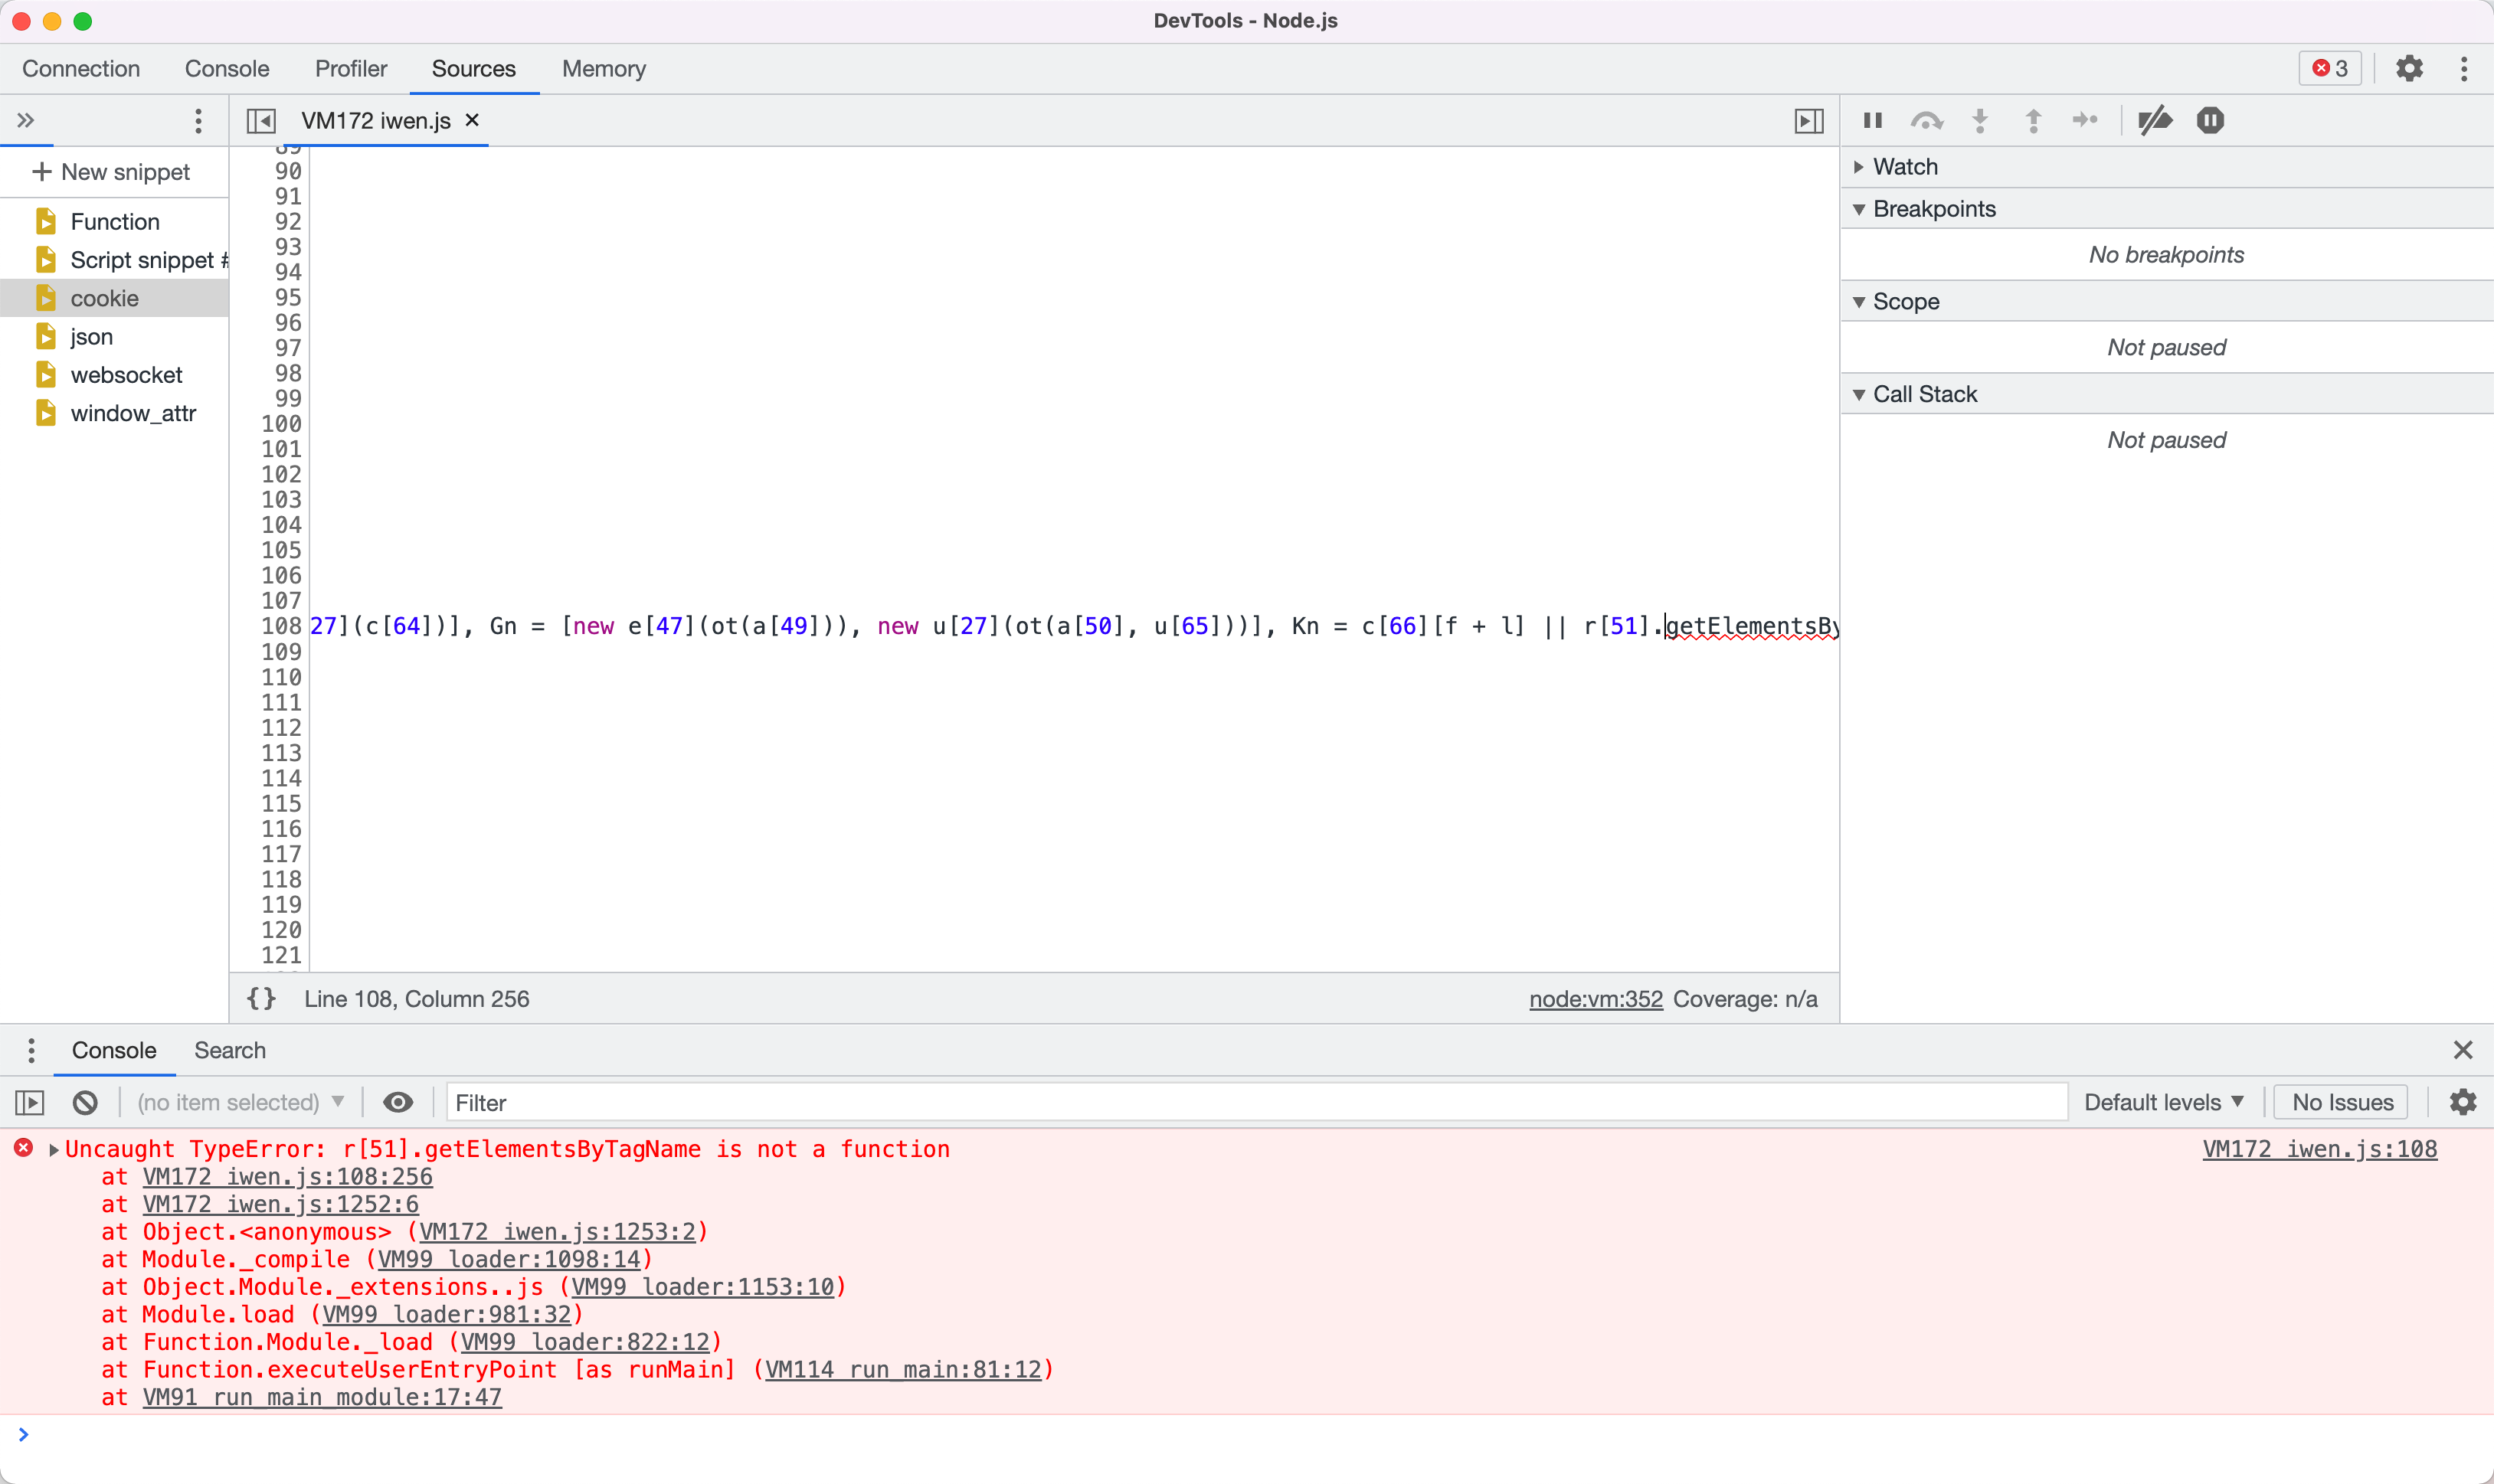
这里r[51]是document,报错的一句r[51].getElementsByTagName(p + d)[r[52]]实际上是document.getElementsByTagName(‘head’)[0];继续补代码如下:
1 | var window = this; |
解释一下为什么这么补,补方法的时候关注3点,一是参数个数,二是返回值类型,三是对实际传入的参数进行特殊处理。因为getElementsByTagName只接受一个参数,所以只需要定义一个形参x。

通过在原网站上调试知传入的实际参数为字符串head,且返回的是一个对象数组。所以上边也对head进行了特殊处理,而且方法的返回值是对象数组。
补好getElementsByTagName方法后,接着运行,接着报错。
接着补createElement:
1 | Document.prototype.createElement = function(x) { |
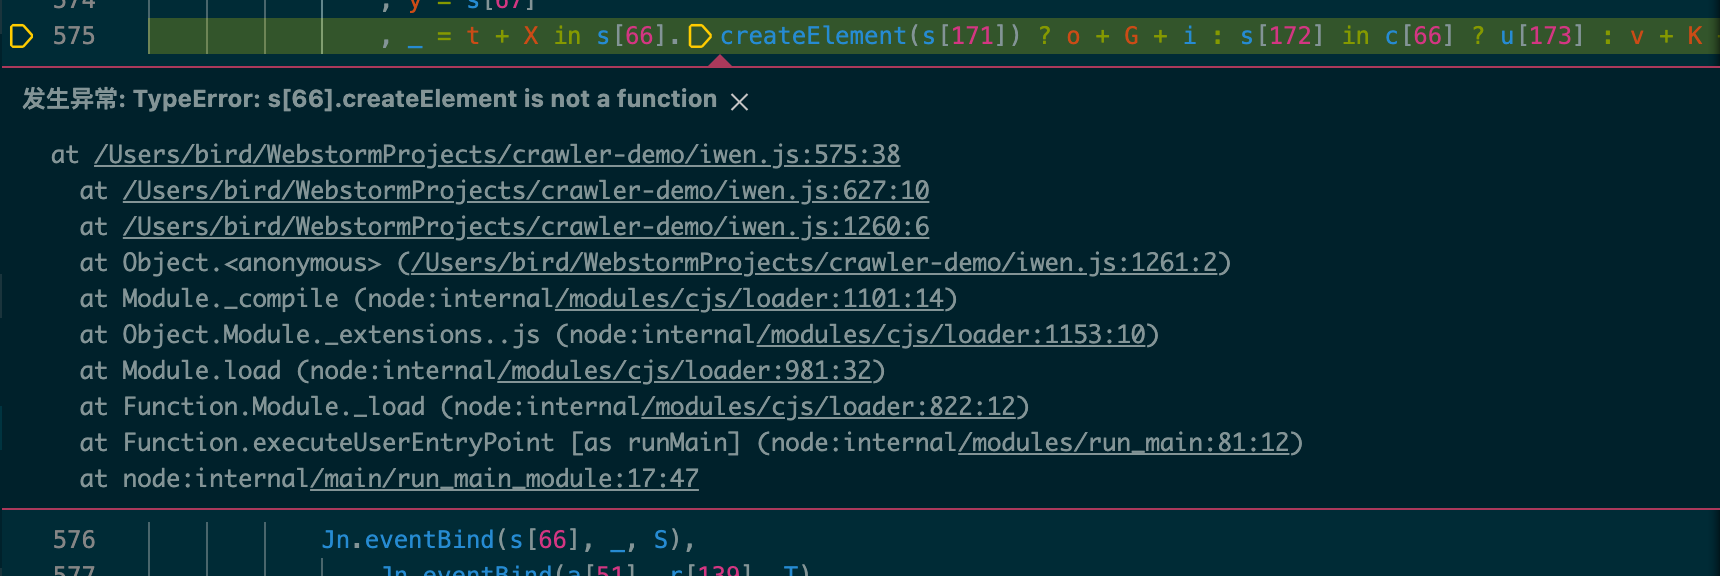
为什么这么补?我们看下面一张图,作说明:
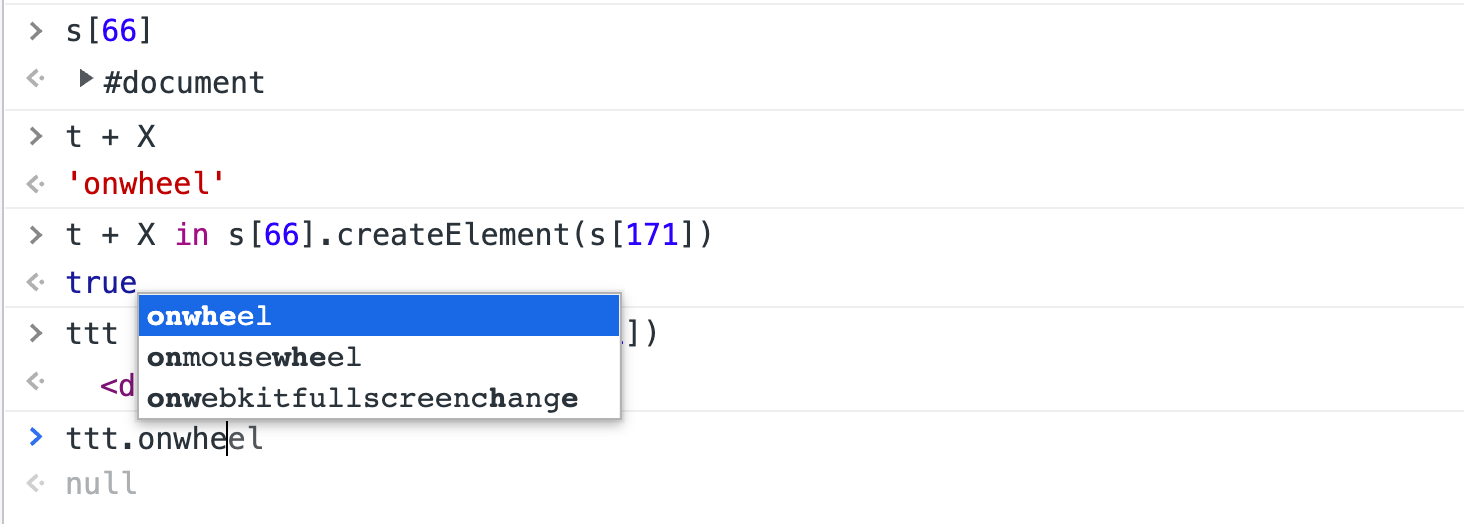
首先很显然createElement要补到Document对象下,然后s[171]为div,并且调用createElement后要返回一个onwheel方法。
补好之后,运行接着报错,如图:
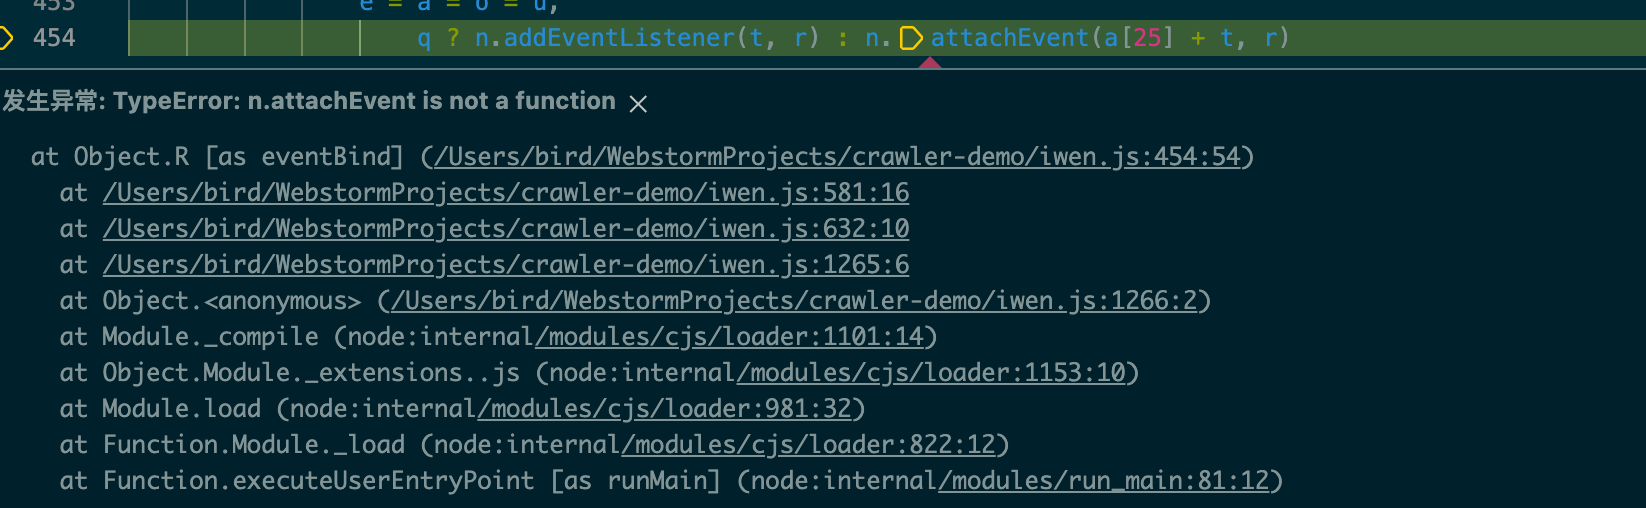
n.attachElement没有定义,补一下:
1 | Document.prototype.attachEvent = function(x, y) { |
补好之后,依旧报错,嗯!逆向分析就是需要耐心:
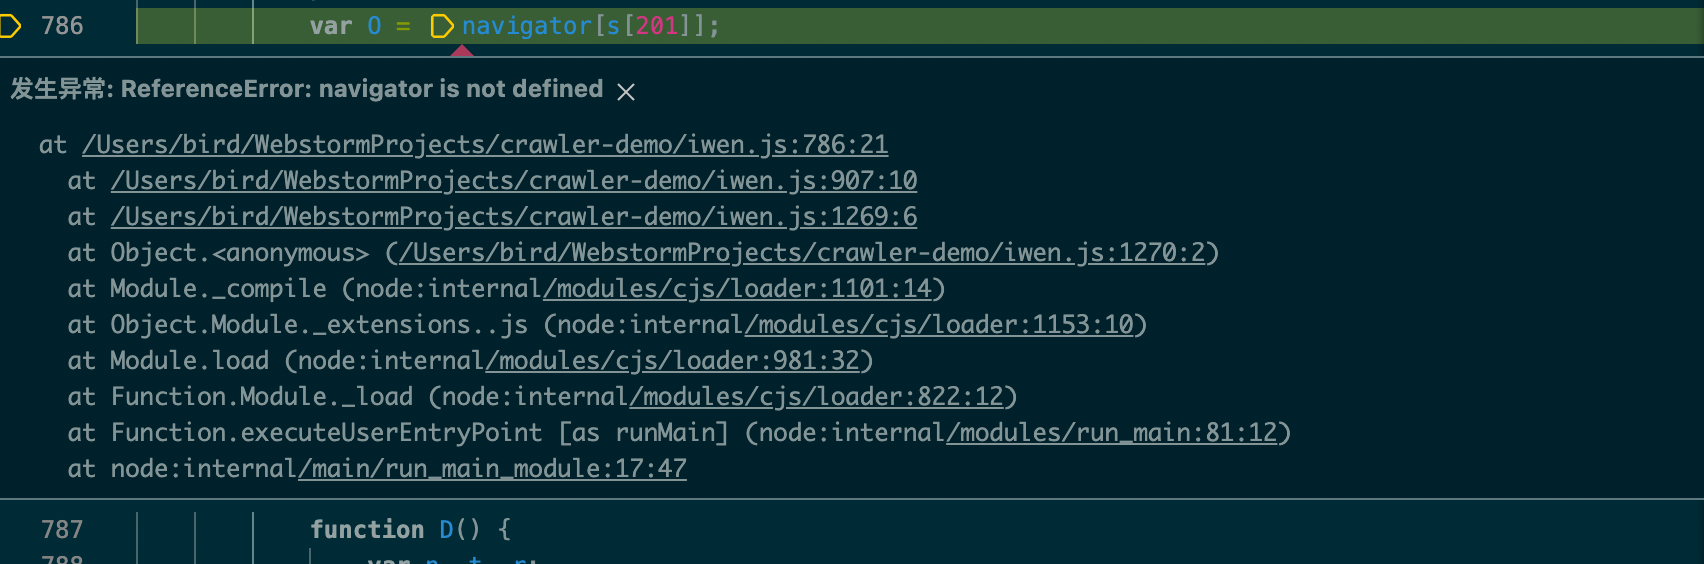
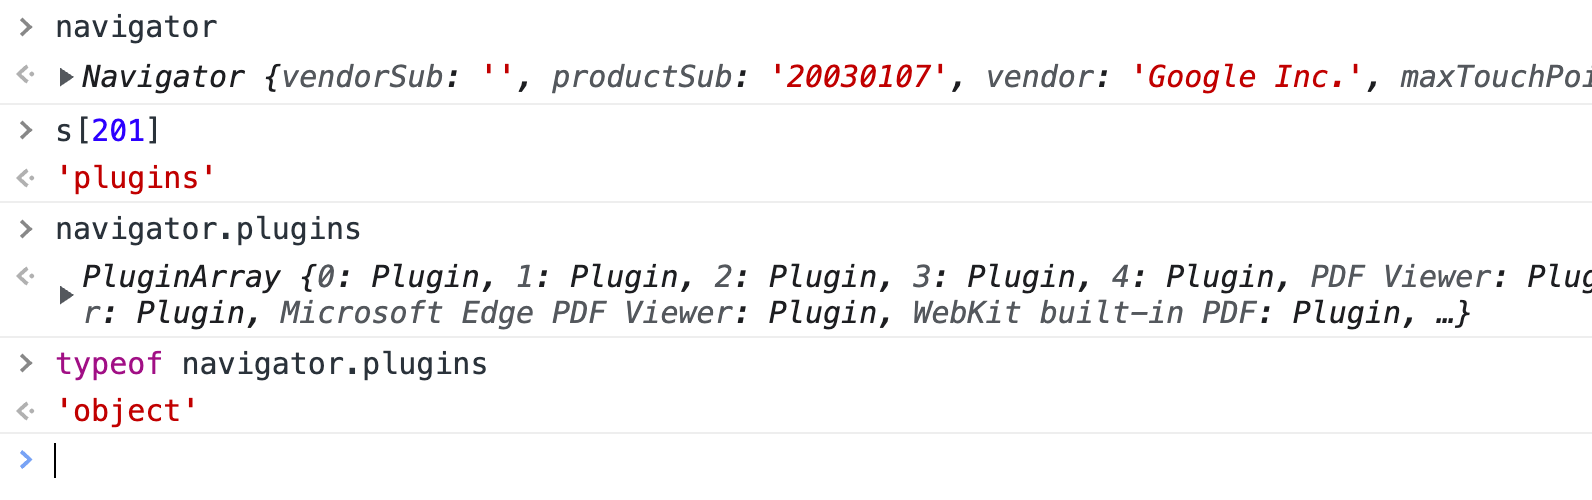
补navigator,可以看到navigator.plugins是一个对象数组,我们这里补一个空就行。
1 | Navigator = function() {}; |
补好之后,运行接着报错:
我们看看这个几个变量是什么,如图:
我们找一下l的声明处,如图:
可以看到l是取自window中的document,所以我们把document作为属性放到window对象下:
1 | document = new Document(); |
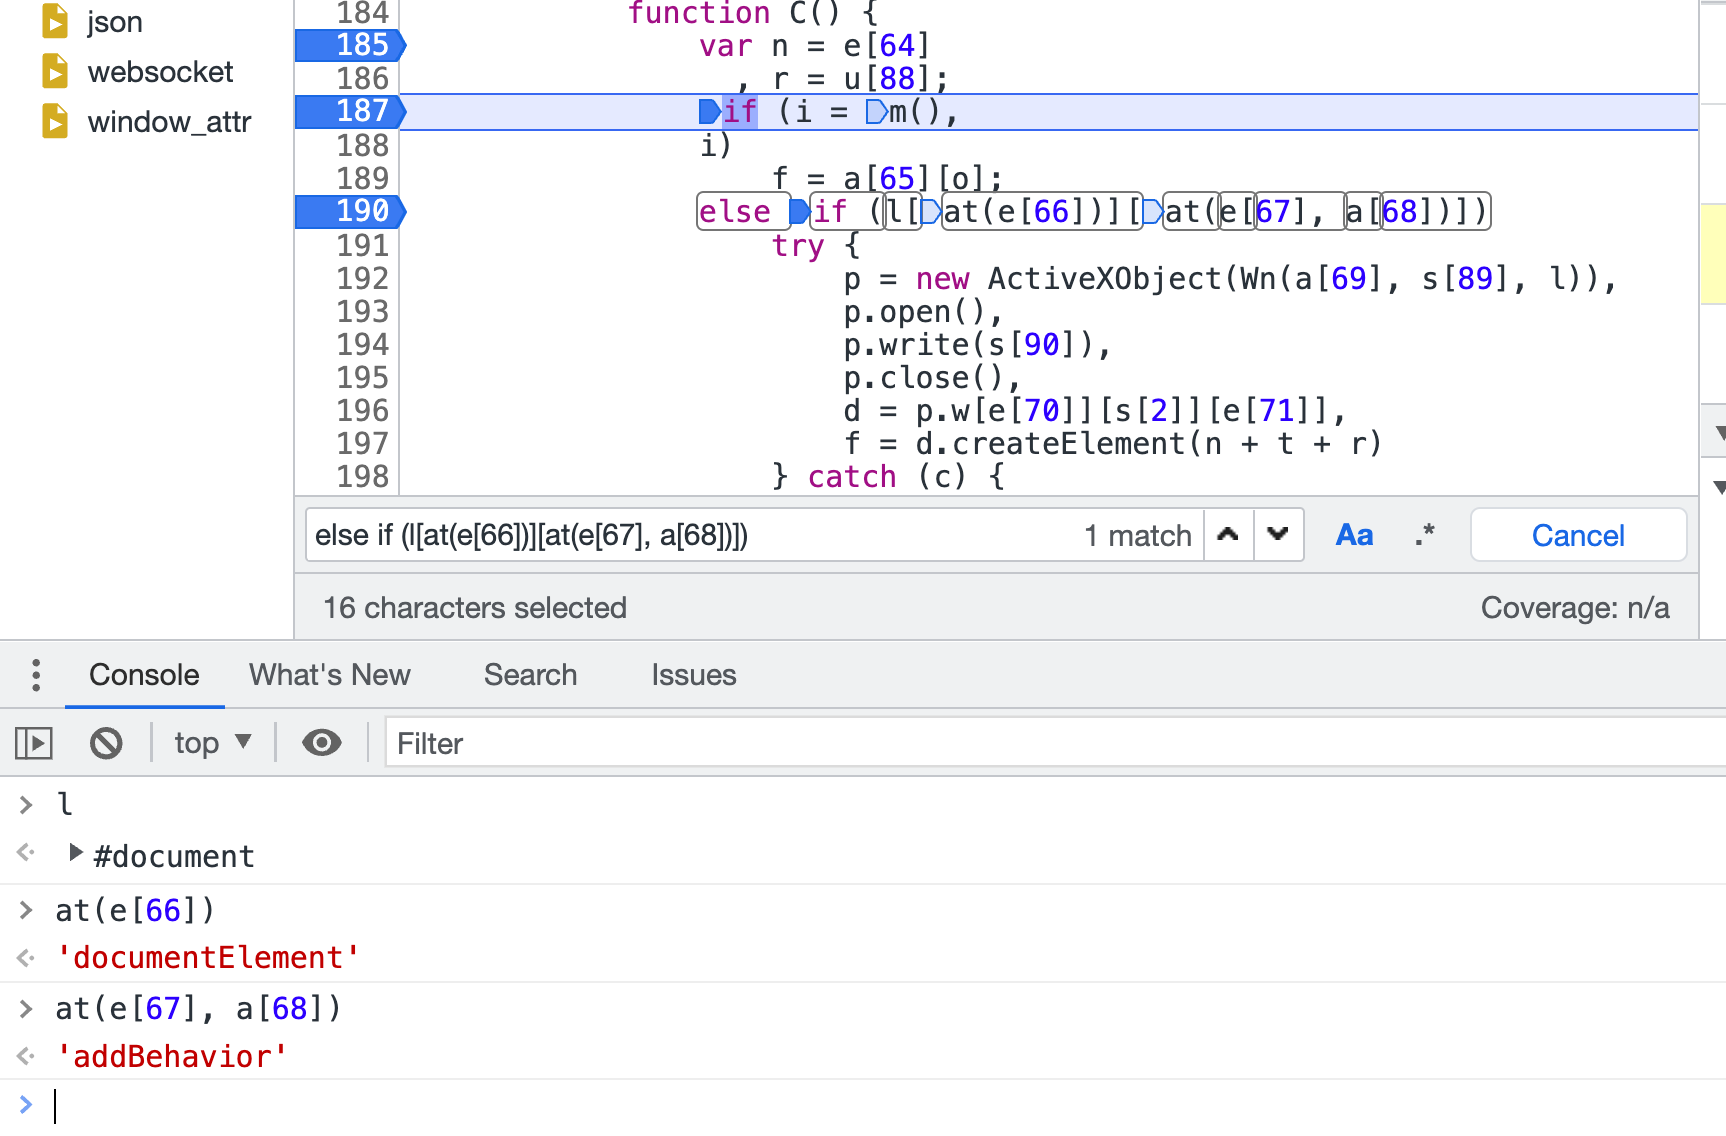
补好之后,再次运行,再次报错:
这里就很奇怪了,因为原始网站这里应该是直接进去上边的if分支,而不是进到这里的else if判断。我们跟进去这个方法m,看看这个m是什么?
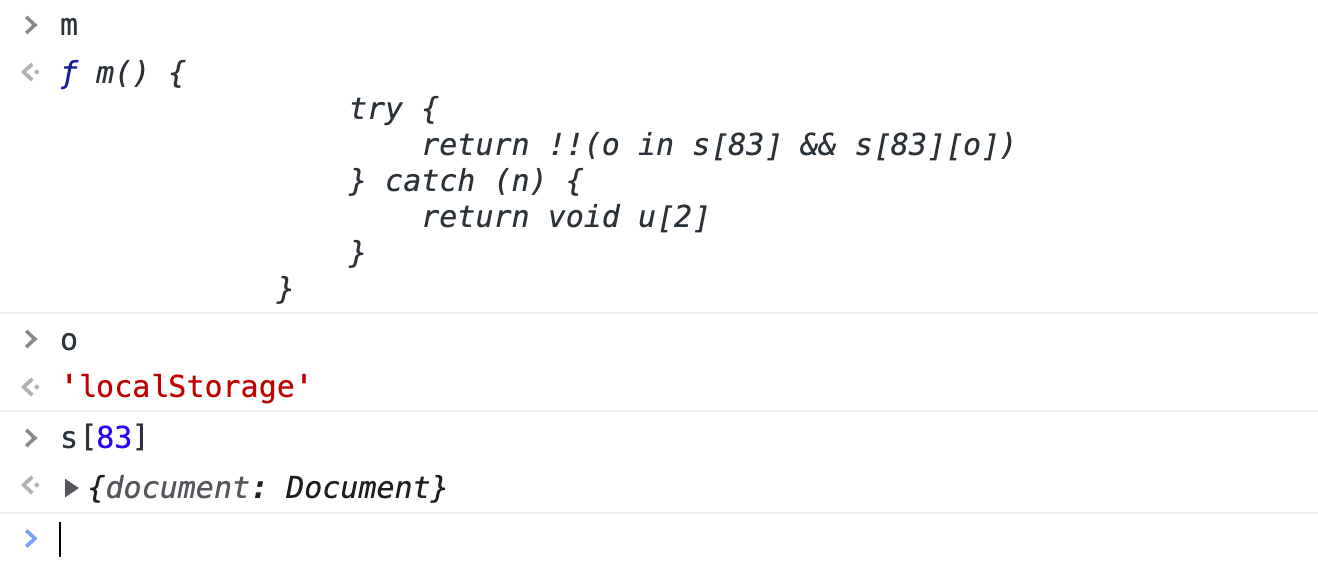
可以看到o是localStorage,s[83]是window对象,这里的意思是判断window对象下是否存在localStorage,并判断这个属性是否为空。我们自己定义一个localStorage给到window。
1 | LocalStorage = function() {} |
补好之后运行,接着报错:
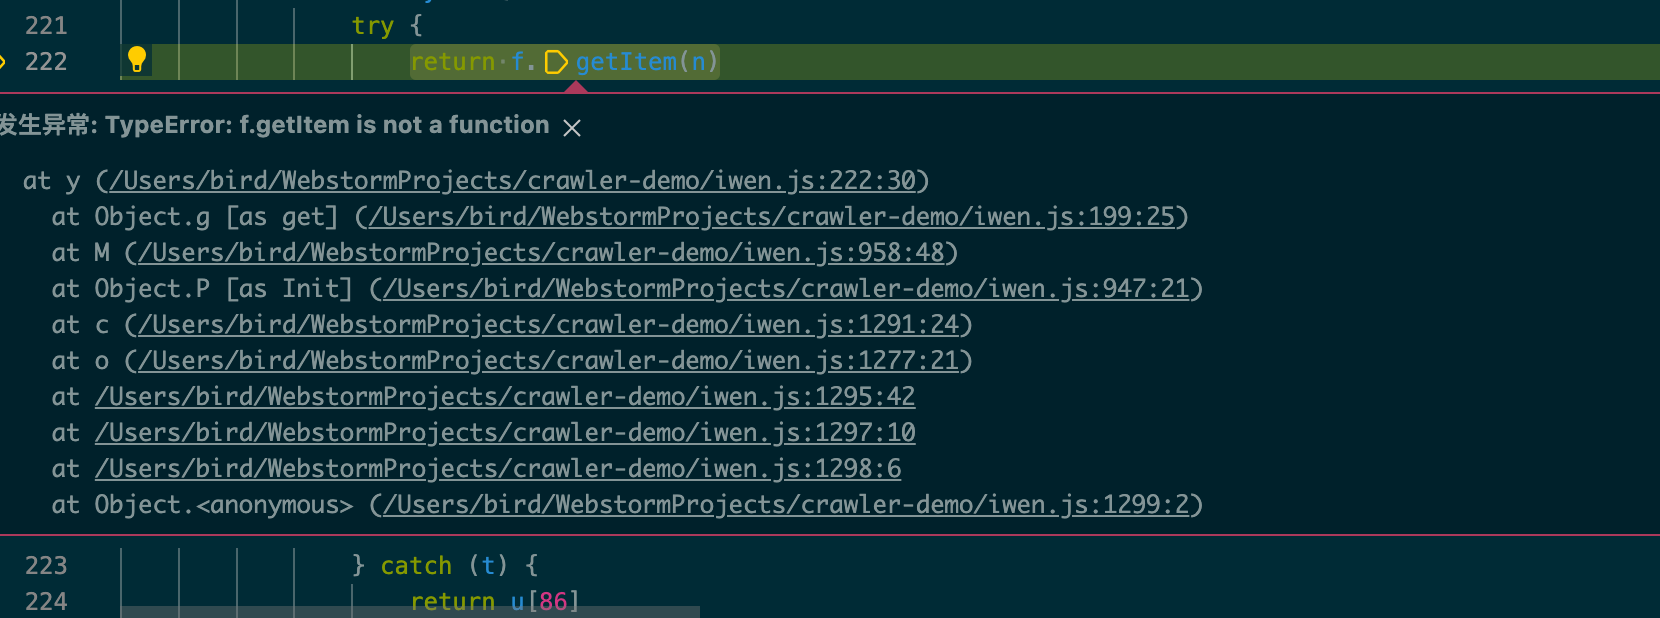
这里的f是localStorage,缺少getItem,我们补一下:
1 | LocalStorage.prototype.getItem = function(x) { |
我们通过原网站,看到该方法接受一个参数,并且只调用了一次,传的参数是hexin-v,返回null,我们照着补就行。
补好之后,接着运行:
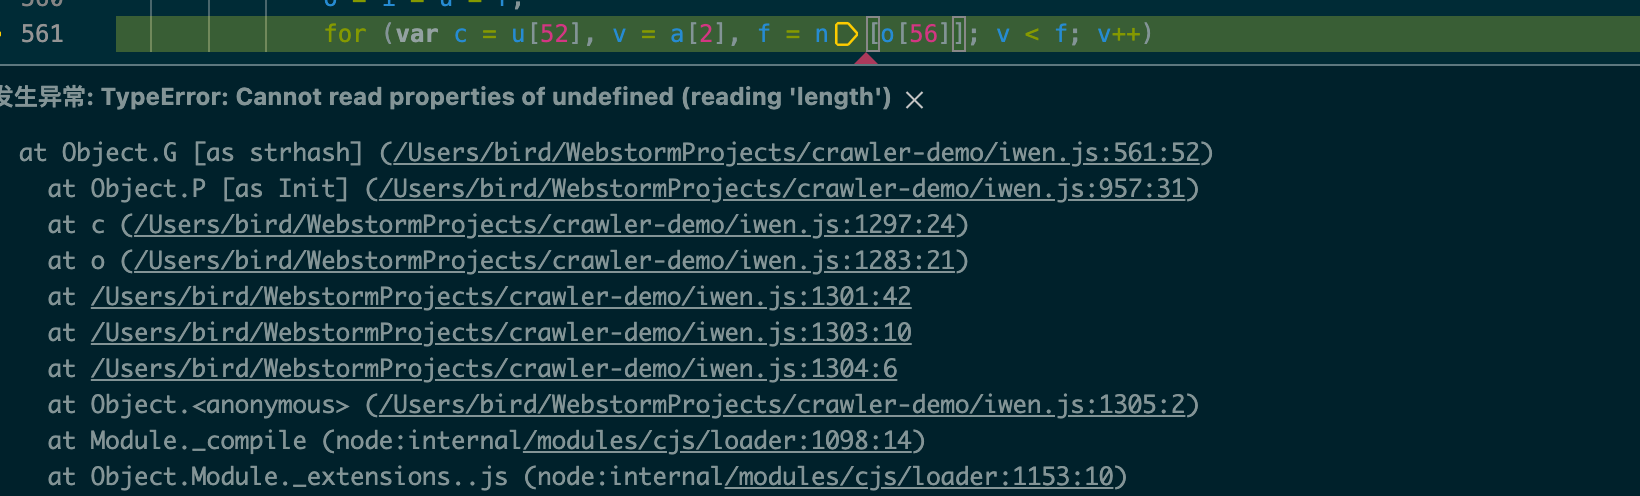
通过调用栈我们看看这个n是啥?n实际是上层函数传入的参数,即navigator.userAgent,原始网站有值,我们没有定义。
我们补上userAgent:
1 | Navigator.prototype.userAgent = "Mozilla/5.0 (Macintosh; Intel Mac OS X 10_15_7) AppleWebKit/537.36 (KHTML, like Gecko) Chrome/100.0.4896.75 Safari/537.36"; |
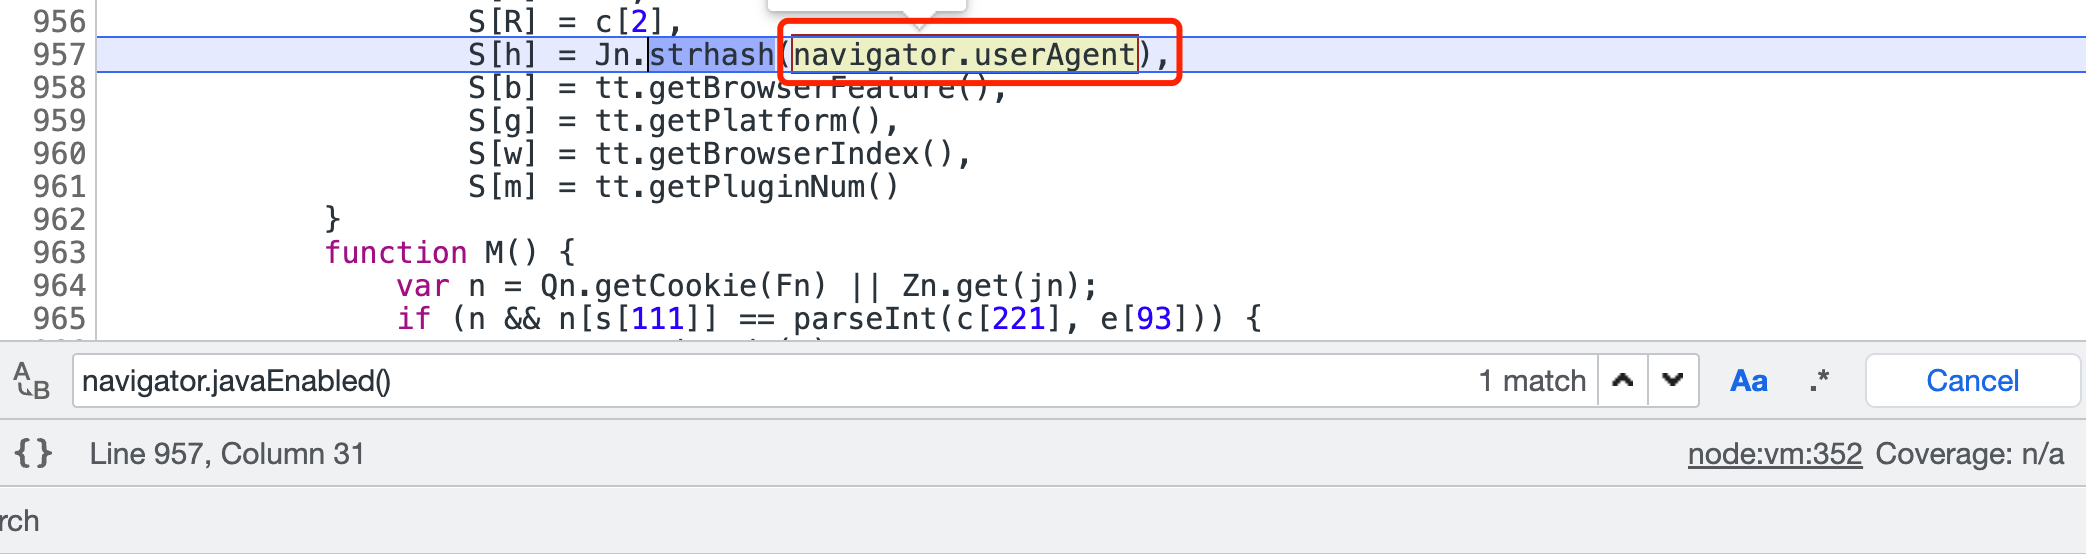
补好之后,运行报错,如下图:
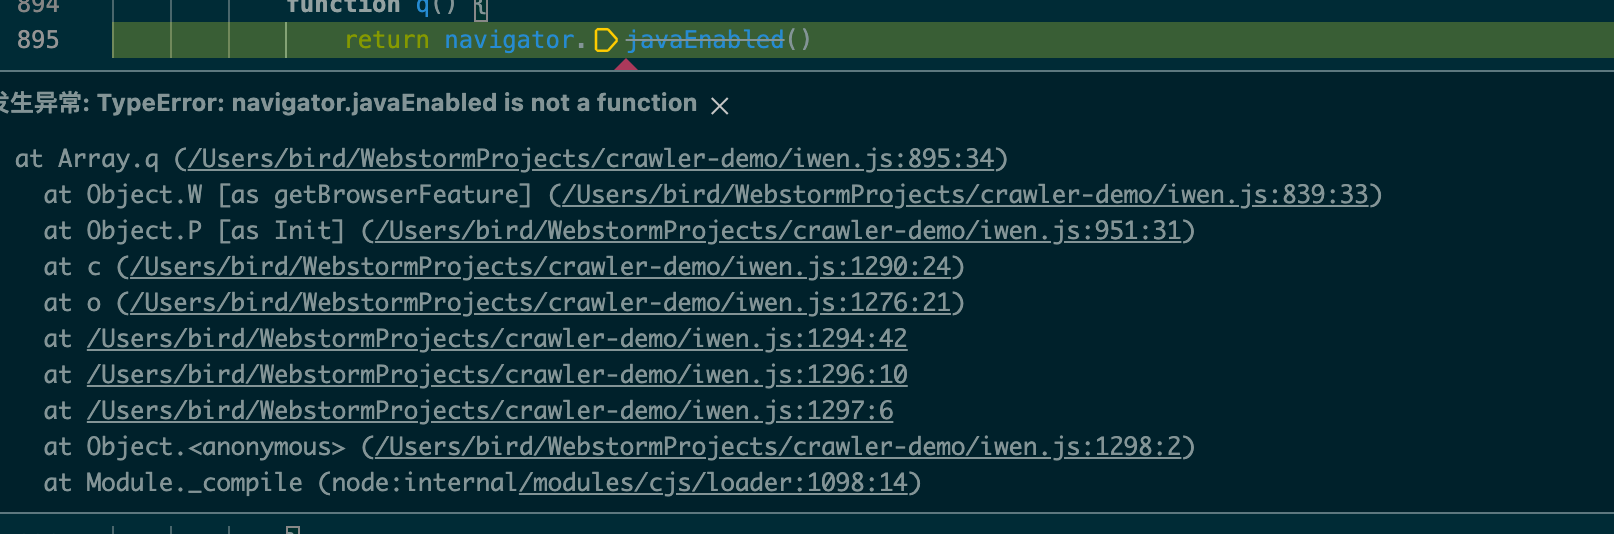
通过原始网站知,javaEnabled方法返回false,那我们也给navigator对象加一个方法javaEnabled返回false即可:
1 | Navigator.prototype.javaEnabled = function() { return false }; |
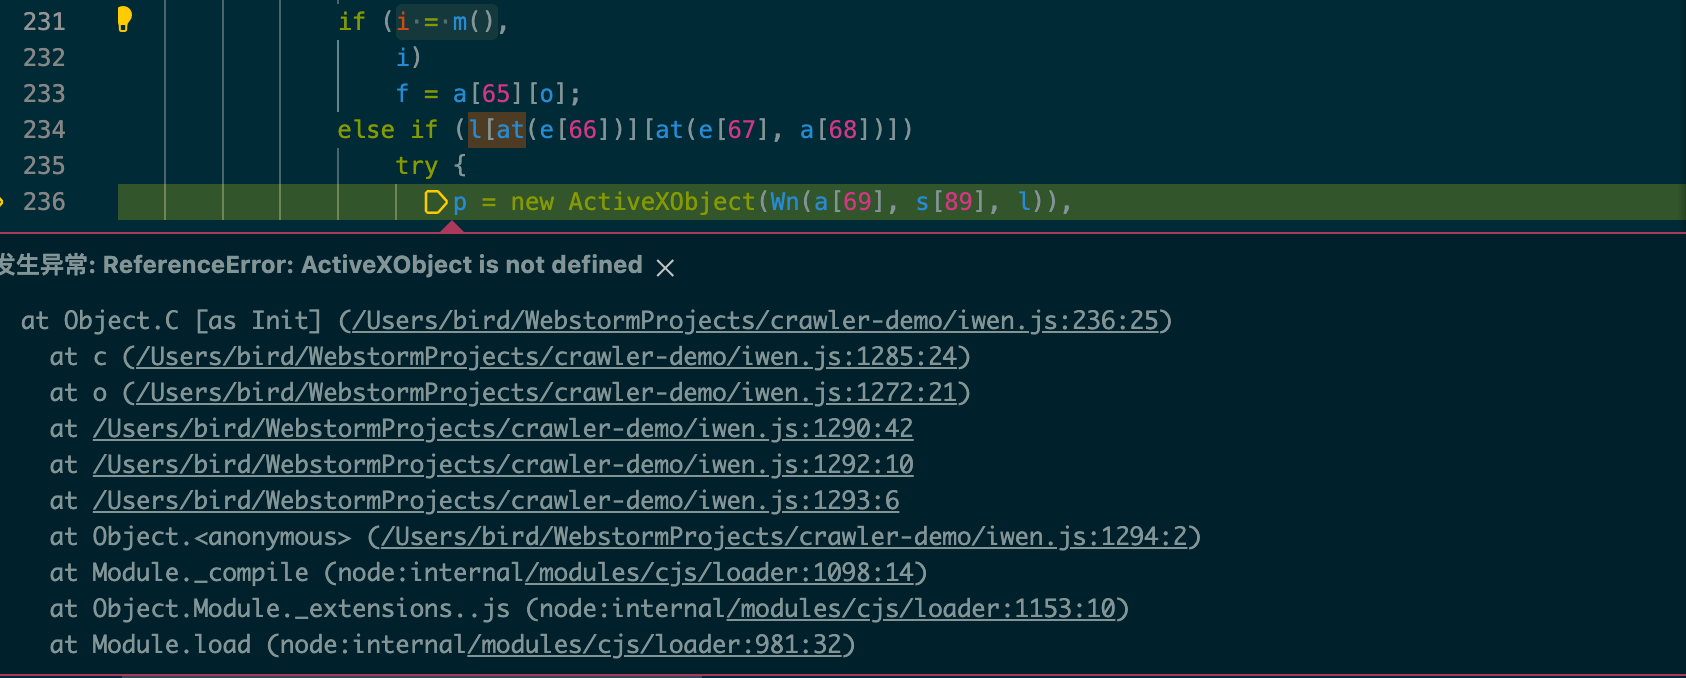
补好之后运行报错:
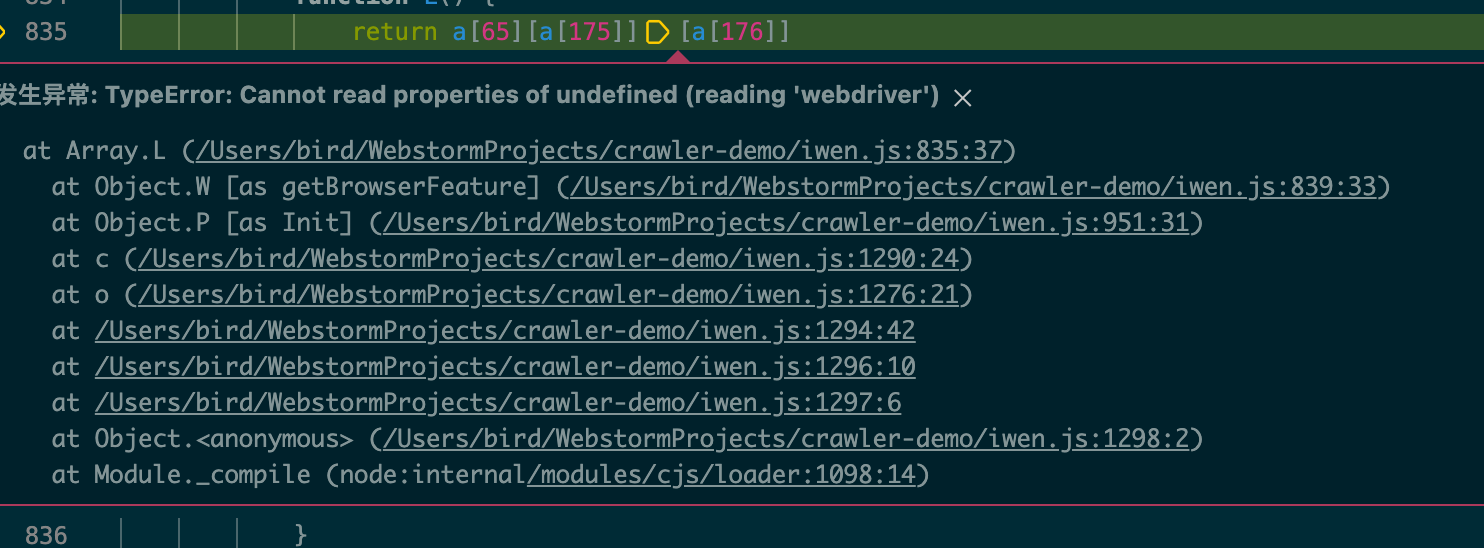
这里a[65]是window对象,a[175]是navigator对象,上面报错是说window.navigator为undefine,我们把navigator作为window的属性即可,修改上面补环境的代码:
1 | var window = {"document": document, "localStorage": localStorage, "navigator": navigator}; |
改好之后运行:
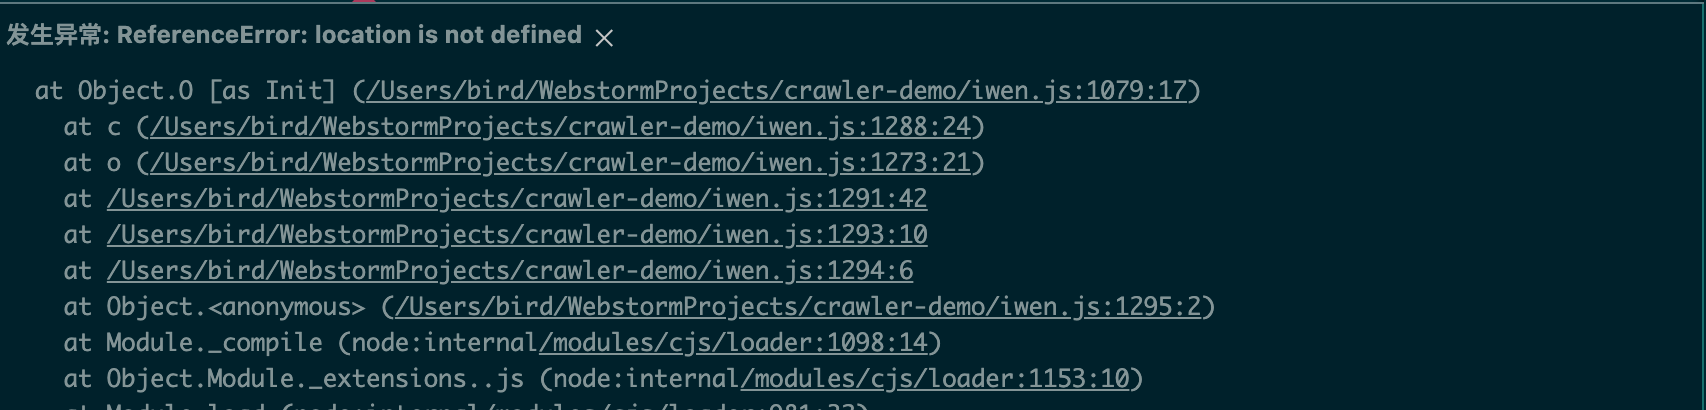
提示location未定义,我们定义一个location对象:
1 | Location = function() {} |
接着运行,依然报错:
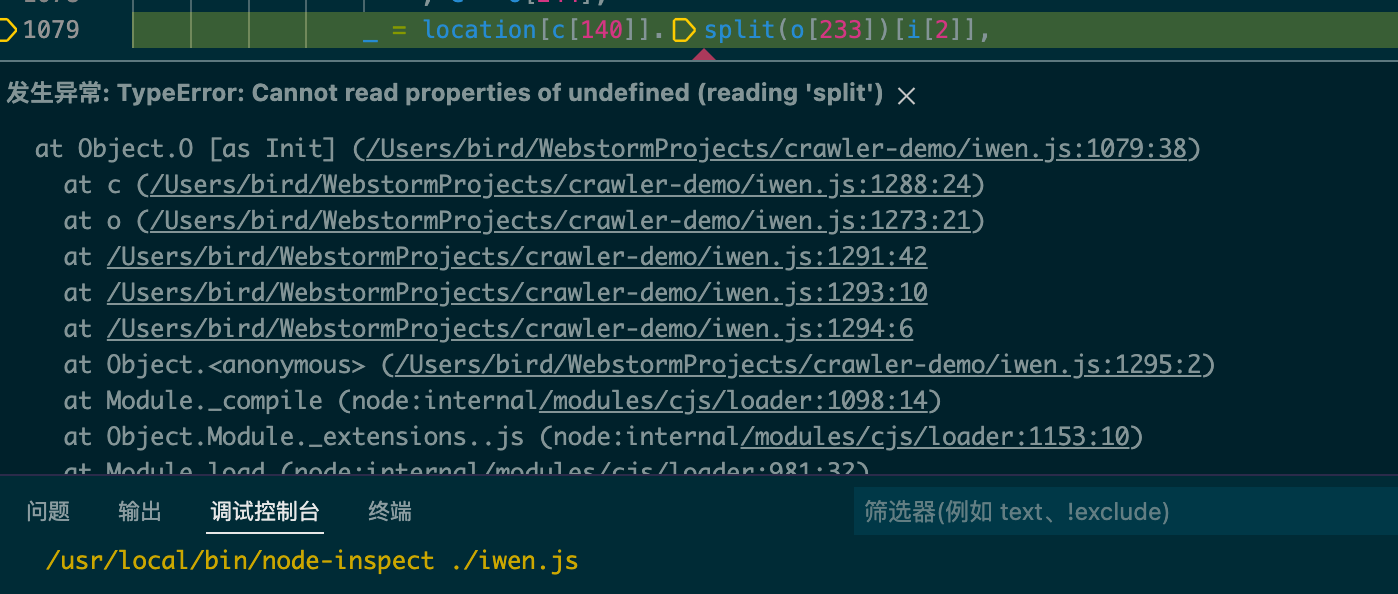
这里的c[140]是href,location.href为空,我们查看原始网站知,location.href就是当前的页面地址,我们补上即可:
1 | Location.prototype.href = "http://www.iwencai.com/unifiedwap/result?w=%E7%BB%BF%E8%89%B2%E7%94%B5%E5%8A%9B%E6%A6%82%E5%BF%B5&querytype=stock"; |
接着运行:
提示location.hostname不存在,我们根据原网站取到location.hostname的值补上:
1 | Location.prototype.hostname = "www.iwencai.com"; |
补好运行,报错:
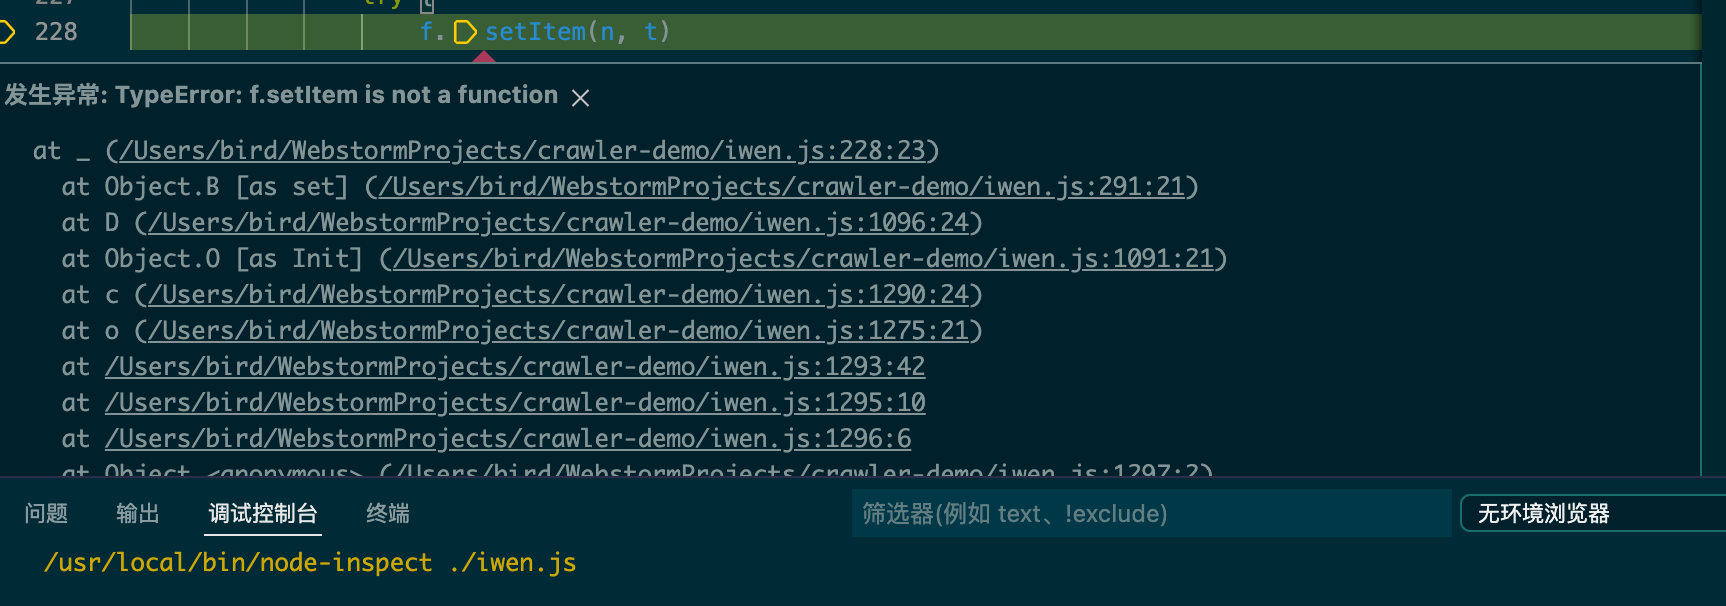
提示localStorage的setItem方法不存在,得嘞,补一个空方法:
1 | LocalStorage.prototype.setItem = function(x, y) { |
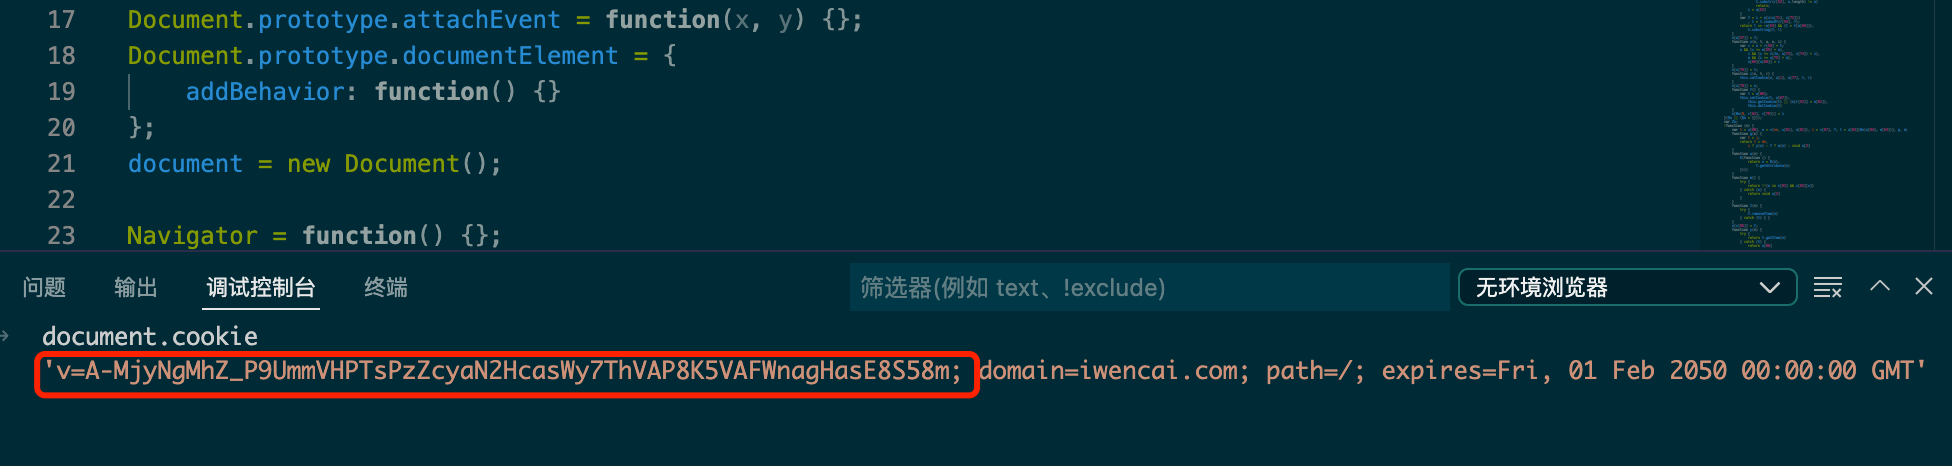
补好之后运行,没有报错!!!
我们取一下cookie的值,也成功看到了v:
上面补环境的代码比较零散,这里统一整理如下:
1 | Document = function() {}; |
总结
本文通过一个例子,介绍了手动补环境的过程,总结如下:拷贝整个JS然后补环境,需要补头补尾,原则上中间的整个JS文件一点也不能动,这样做的好处是中间的文件可以用一个占位符表示,以后每次JS更新了,只需要更新这个占位符的内容,这样更加通用,维护起来更加容易。
关于代码的获取
若需要代码,扫描加微信即可。